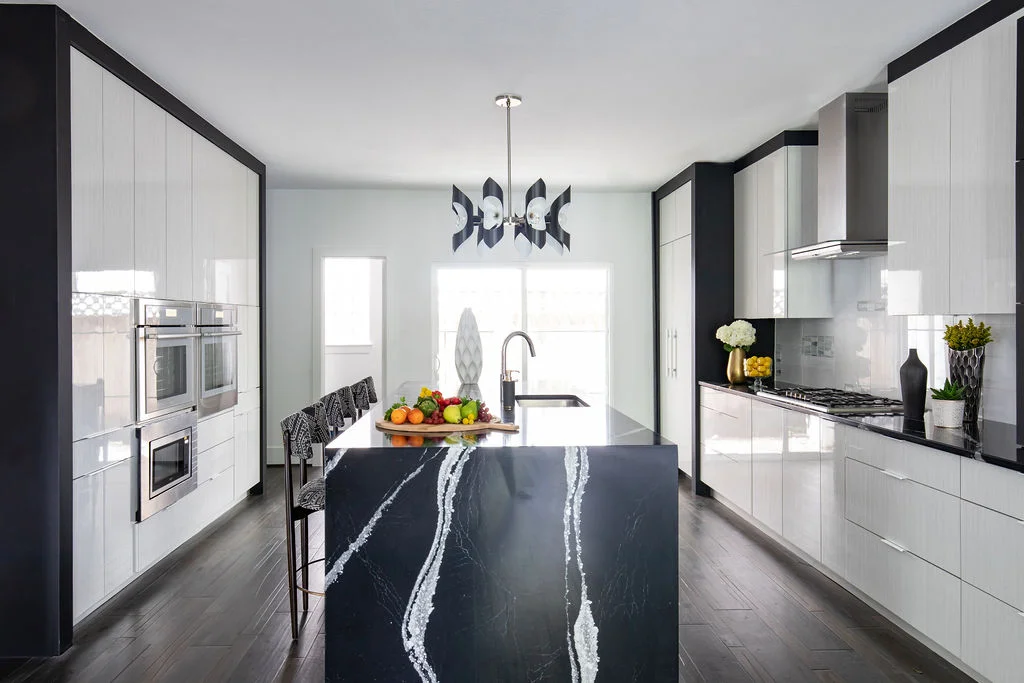
How Much Should I Expect to Pay for a Kitchen Remodel in Cypress, Texas?

A kitchen remodel is one of the most valuable home improvement projects, enhancing functionality, aesthetics, and overall property value. If you're considering a kitchen remodel in Cypress, Texas, understanding the cost factors involved is crucial. Prices can vary widely based on the scope of the renovation, material choices, and labor costs. This guide breaks down what you should expect to pay for a kitchen remodel in Cypress, providing insights into different budget tiers, factors affecting costs, and ways to maximize your investment.

Average Cost of a Kitchen Remodel in Cypress, Texas

The cost of a kitchen remodel in Cypress generally falls within three price ranges:

Remodel TypeCost Range (2025 Estimates)
Minor Remodel$15,000 - $30,000
Mid-Range Remodel$30,000 - $60,000
High-End Remodel$60,000 - $150,000+

Each of these remodeling tiers depends on various factors, including materials, labor, and the extent of structural changes.

how much should i expect to pay kitchen remodel cypress texas

Cost Breakdown by Category

1. Cabinetry & Hardware

Cabinets are often the most significant expense in a kitchen remodel. Costs vary depending on whether you choose stock, semi-custom, or fully custom cabinetry.

2. Countertops are a crucial element in any remodeling project, impacting both aesthetics and functionality.

Countertops contribute both aesthetic and functional value to your kitchen. Prices fluctuate based on material selection.

3. Flooring choices can greatly impact the overall feel of a kitchen renovation.

Flooring prices depend on the material and installation complexity.

4. Appliances

Modernizing appliances can significantly impact your budget. Energy-efficient and smart appliances typically cost more but provide long-term savings.

5. Plumbing & Electrical

If your remodel includes relocating sinks, dishwashers, or adding an island, expect additional plumbing and electrical costs.

6. Lighting

Lighting enhances both functionality and ambiance.

7. Backsplash

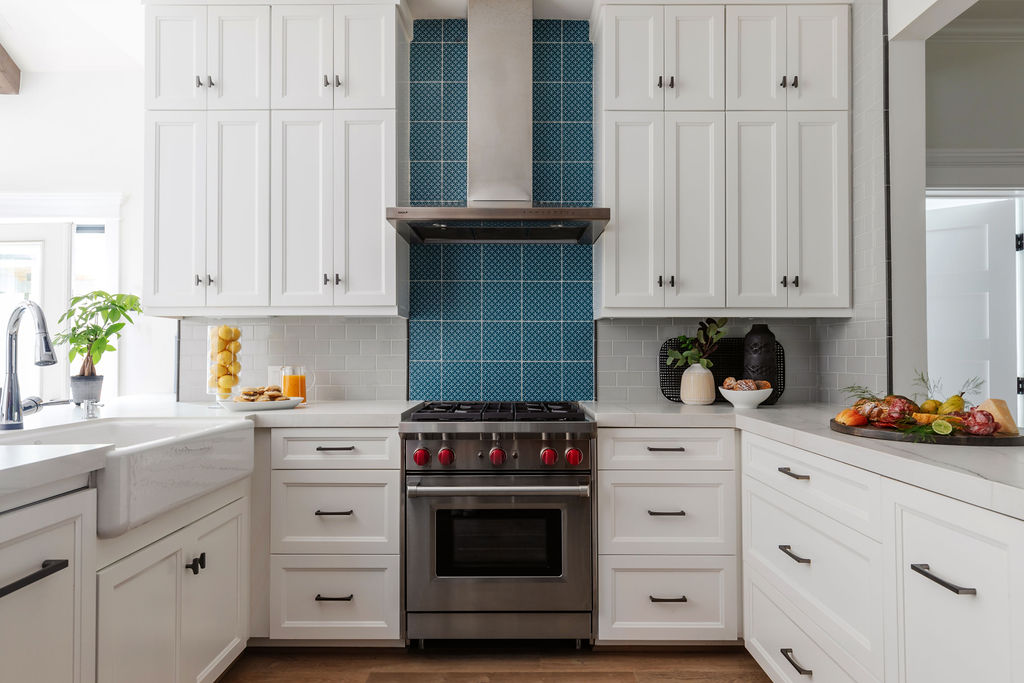
Backsplash installation costs vary based on material choice.

Additional Costs to Consider

1. Demolition & Disposal

2. Permits & Inspections

3. Design & Project Management Fees

How to Save on Your Kitchen Remodel

Remodeling a kitchen is a major investment, but there are plenty of ways to cut costs without sacrificing quality or style. By making strategic choices, you can achieve a stunning kitchen transformation while keeping your budget under control. Here’s how to maximize value and save money on your kitchen remodel in Cypress, Texas.

1. Prioritize Key Upgrades

Not all kitchen upgrades have the same impact. If you’re working with a limited budget, focus on changes that will deliver the most noticeable improvement in both aesthetics and functionality.

By prioritizing these high-impact upgrades, you can achieve a dramatic transformation while keeping costs manageable.

2. Reface Instead of Replace

Cabinet replacement can account for 30-50% of your total remodeling budget, making it one of the most expensive elements of a kitchen remodel. If your existing cabinets are structurally sound, refacing or refinishing them can save thousands of dollars.

Refacing cabinets can reduce costs by 30-50% compared to full cabinet installation while still delivering a fresh, updated kitchen aesthetic.

3. Choose Cost-Effective Materials

High-end materials can quickly inflate your kitchen renovation budget, but many affordable alternatives provide a similar look and durability at a lower cost.

By selecting budget-friendly materials that still provide durability and aesthetic appeal, you can achieve a high-end kitchen remodel without overspending.

4. DIY Where Possible

Labor costs can account for 30-50% of your remodeling budget. Tackling some projects yourself can significantly cut costs.

However, some tasks—such as electrical work, plumbing, and gas line installations—should always be handled by licensed professionals to ensure safety and compliance with local building codes.

5. Work with a Design-Build Firm

Hiring a professional remodeler may seem like an added expense, but working with an experienced design-build firm like Keechi Creek Builders can actually help you save money in the long run.

By partnering with an experienced design-build firm, you can achieve a high-quality remodel while keeping costs under control.

Keechicreekbuilders · How Much Should I Expect to Pay Kitchen Remodel Cypress Texas?

Is a Kitchen Remodel Worth the Investment in Cypress, Texas?

A kitchen remodel offers excellent ROI (Return on Investment), increasing home value and appeal. According to Remodeling Magazine’s Cost vs. Value report, mid-range kitchen remodels in Texas yield a significant return on investment for homeowners. 50-70% return on investment. In high-demand markets like Cypress, well-designed kitchens can significantly boost resale value. The impact is even greater in neighborhoods with competitive real estate markets, where updated kitchens make homes stand out to buyers.

Kitchen remodel costs in Cypress, Texas, range from $15,000 for a minor update to $150,000+ for a luxury renovation. Understanding key cost factors—cabinetry, countertops, appliances, labor, and permits—can help you budget effectively. Whether you’re making minor updates or undertaking a full-scale remodel, working with an experienced builder like Keechi Creek Builders ensures a smooth, high-quality renovation that enhances your home’s value and functionality.

frame

Custom Kitchen Cabinetry: The Key to a Unique Cooking Space

Custom kitchen cabinetry plays an essential role in designing a unique cooking space that meets individual preferences while maximizing efficiency. These tailored solutions provide optimized storage, utilizing features such as pull-out drawers and rotating shelves. Their adaptability to various kitchen layouts enhances workflow and guarantees comfort, with options for ergonomic design. Environmentally friendly materials, including reclaimed wood and low-VOC finishes, contribute to both aesthetics and sustainability. Additionally, custom cabinetry represents a valuable investment, often boosting home resale potential. Understanding the full range of benefits associated with custom cabinetry can further inform your decisions for a personalized cooking environment.

Key Takeaways

Advantages of Custom Cabinetry

In the domain of kitchen design, custom cabinetry stands out for its myriad advantages that cater to both functionality and aesthetics. One of the most significant benefits is the ability to create tailored storage solutions that meet specific needs. Unlike mass-produced alternatives, which often overlook the unique nuances of kitchen layouts, custom cabinets maximize every inch of available space, employing creative features such as rotating shelves and pull-out drawers to efficiently use corners and awkward areas. Additionally, custom cabinets can be made from locally sourced materials, supporting eco-friendly practices that appeal to today's environmentally conscious homeowners. This commitment to sustainability is a hallmark of home remodeling in Houston, ensuring projects align with modern environmental values.

Moreover, these cabinets are crafted from high-quality materials, ensuring durability and longevity. Superior craftsmanship not only leads to a longer lifespan than stock cabinets but also guarantees resistance to wear and tear, making them a reliable investment. The attention to detail, from finishes to intricate cabinet styles, enhances the visual appeal of the kitchen while providing essential functionality. Custom cabinets are a true reflection of high craftsmanship, showcasing the artistry involved in their handmade production.

Additionally, the integration of innovative design elements allows for enhanced usability, with options such as soft-close mechanisms and concealed waste management, promoting a tidy environment. Consequently, custom cabinetry represents a blend of practicality and elegance, making it a worthy consideration for any kitchen renovation endeavor.

Design Flexibility and Ergonomics

Design flexibility and ergonomics play an essential role in transforming a kitchen into a functional and enjoyable space. Custom kitchen cabinetry allows homeowners to adapt their cooking areas to personal preferences and lifestyle needs, reflecting current design trends while prioritizing user comfort. The key aspects to take into account include:

  1. Maximized Space Use: Custom cabinets are tailored to fit any kitchen layout, offering the versatility to meet changing needs for both cooking and entertaining. These tailored solutions are instrumental in creating unique spaces that enhance the homeowner's experience in their kitchen.

  2. Material and Style Options: With a wide array of materials and finishes available, homeowners can create a kitchen that not only functions well but also visually impresses, ranging from high-gloss to natural wood finishes. Additionally, organized zones within the cabinetry enhance the workflow by streamlining task separation. Effective storage solutions, such as custom cabinets, can further optimize space and organization in the kitchen.

  3. Efficient Layout Considerations: Learning from commercial kitchen designs, effective layouts utilize available storage and allow for adaptability, enhancing workflow and overall kitchen functionality. Custom cabinetry can significantly improve both functionality and aesthetic appeal, ensuring the space meets the demands of modern culinary activities.

Incorporating ergonomic solutions within custom cabinetry guarantees that the kitchen serves as a top-notch workspace, minimizing strain and maximizing efficiency. This thoughtful approach to design encourages a seamless cooking experience, making kitchen tasks more enjoyable and less physically taxing, ultimately elevating the value of the home.

Functionality and Efficiency

The blend of design flexibility and ergonomics naturally leads to the importance of functionality and efficiency in custom kitchen cabinetry. Tailoring cabinets to fit specific dimensions, including ceiling heights and wall angles, guarantees peak space optimization, transforming unused areas into practical storage solutions. This meticulous approach transforms cluttered environments into well-organized spaces where every item holds a designated place, greatly enhancing workflow efficiency.

Incorporating features like rotating shelves, Lazy Susans, and pull-out drawers effectively capitalizes on corner spaces, expanding usable kitchen area while promoting improved access. By aligning the cabinetry design with the five-zone method—cooking, prep, cleaning, consumables, and non-consumables—an efficient kitchen layout emerges, reducing the distance between frequently used items and their relevant zones. Additionally, the use of custom designs ensures that storage solutions are tailored to meet specific individual needs and preferences. In fact, custom cabinets maximize storage in unusual layouts by providing solutions for specific storage needs, ensuring that no space is wasted. The incorporation of advanced technology during the design process allows for iterative refinements that further enhance the cabinetry's functionality.

Moreover, tailored storage solutions, including customized drawers, dividers, and pull-out racks, streamline organization, guaranteeing that essentials are always at hand. This strategic organization not only improves the overall workflow but also minimizes the time spent searching for items, ultimately maximizing kitchen functionality. As a result, custom cabinetry becomes an indispensable element in creating an efficient, user-friendly cooking space that meets individual needs seamlessly.

Environmental Considerations

While renovating or building a kitchen, environmental considerations have become increasingly important, as homeowners seek to create spaces that are both functional and eco-friendly. One of the primary focuses is on sustainable sourcing, which not only addresses personal preferences but also contributes to broader ecological efforts. Opting for materials that reduce waste and support responsible forestry can create a significant positive impact.

Consider the following three sustainable options for custom kitchen cabinetry:

  1. FSC-Certified Wood: This guarantees that wood products come from forests that are responsibly managed, which supports sustainable forestry practices.
  2. Reclaimed Wood: Utilizing reclaimed materials not only reduces waste but also provides unique character and history to your kitchen.
  3. Low-VOC Finishes: By selecting finishes with low volatile organic compounds, homeowners can create a healthier indoor environment by minimizing the release of harmful chemicals. Additionally, choosing high-quality materials ensures the durability and aesthetic appeal of your cabinetry.

Incorporating eco-friendly materials and practices not only enhances the kitchen's aesthetic but plays an important role in waste reduction and environmental protection. Eco-friendly cabinetry contributes to overall environmental conservation efforts, allowing individuals to contribute positively to the health of our planet.

Practical and Aesthetic Benefits

Maximizing functionality and beauty, custom kitchen cabinetry offers numerous practical and aesthetic benefits for any kitchen renovation or build. One primary advantage is space optimization; custom cabinets are tailored to fit specific dimensions, guaranteeing every inch of space is utilized efficiently. This intelligent design transforms unused areas into useful compartments, thereby reducing clutter and fostering a streamlined kitchen environment. Features like rotating shelves and Lazy Susans enhance storage capabilities, while appliance concealment behind custom panels promotes design coherence throughout the space.

Additionally, custom cabinetry enhances organization by providing storage solutions that cater to individual needs, with designated places for every item. This meticulous arrangement not only improves accessibility but also facilitates efficient workflow during kitchen tasks. The ergonomic design of these cabinets, including height-adjustable shelves and pull-out drawers, guarantees comfort and reduces strain while cooking.

From an aesthetic perspective, custom cabinetry allows homeowners to express their personal style through a vast array of materials, finishes, and hardware options. The result is a unique cooking space that aligns with overall home aesthetic, combining practical utility with personalized beauty, ultimately delivering a kitchen tailored to both functional demands and visual aspirations.

Investment and Resale Value

Custom kitchen cabinetry represents not only a significant design choice but also a strategic investment that can yield substantial returns. A carefully executed ROI analysis indicates that custom cabinets can provide a return ranging from 60% to 80% or more, particularly when integrated into a well-renovated kitchen. In addition, these bespoke elements can elevate a home's resale value by 10-15%, a remarkable advantage in fluctuating real estate markets.

Key considerations regarding investment and resale value include:

  1. Financial Justification: The initial costs of custom cabinets, ranging from $22,500 to $87,500 for an average-sized kitchen, are mitigated by their long-term value and durability.
  2. Market Appeal: Custom cabinetry acts as a significant selling point, capturing the interest of discerning buyers who prioritize high-quality kitchen features.
  3. Resale Trends: Homes that showcase custom kitchens often outperform standard models, reflecting a robust demand for unique, tailored spaces.

Personalization Options

Offering a wealth of personalization options, custom kitchen cabinetry allows homeowners to tailor their spaces to meet both functional needs and aesthetic preferences. One of the fundamental aspects of this customization is color coordination, where door colors can be selected to either blend seamlessly with the kitchen's overall palette or to create striking contrasts that enhance the space's visual appeal. This flexibility affords homeowners the ability to express their personal style while ensuring that the cabinetry complements existing decor.

In addition to color, hardware selection plays an essential role in achieving the desired look and functionality. Homeowners can choose from an extensive range of hardware options, including sleek modern handles or more traditional vintage knobs, which can drastically alter the cabinet's appearance. The variety of drawer pulls, hinges, and both simple and ornate knobs available allows for enhanced customization that can align with different design styles. Moreover, incorporating functional hardware features such as soft-close hinges and smooth-operating drawer slides not only elevates usability but also contributes to the kitchen's overall aesthetic, ensuring that the cabinetry is both beautiful and practical.

Choosing the Right Materials

When choosing materials for custom kitchen cabinetry, it is essential to contemplate both durability and environmental sustainability, as these factors greatly impact the longevity and ecological footprint of your kitchen design. Options such as hardwood offer durability and a classic aesthetic, but may require more maintenance and come with a higher price point, while engineered wood and laminate present more affordable alternatives that can meet diverse design preferences, albeit with some trade-offs in durability. Additionally, exploring eco-friendly material options can not only enhance the functionality of your cabinetry but also contribute to a healthier indoor environment, making informed decisions vital for achieving a suitable balance between style, practicality, and sustainability.

Material Durability Considerations

Choosing the right materials for kitchen cabinetry involves careful consideration of durability, functionality, and aesthetics. Understanding various wood compositions and their durability ratings is essential for making an informed decision. Different materials carry specific characteristics that can greatly impact the longevity and maintenance of your kitchen cabinets.

  1. Solid Wood: Known for its strength and endurance, solid wood requires careful sealing to prevent moisture damage but offers unmatched beauty with unique grain patterns. Regular maintenance, such as re-staining, enhances its lifespan.

  2. Engineered Wood: Options like plywood and MDF provide greater stability than solid wood, though MDF is susceptible to moisture. These materials are generally more affordable and versatile, accepting various finishes.

  3. Laminate and Melamine: These materials boast excellent resistance to scratches and moisture, yet they can be challenging to repair once damaged. They offer a cost-effective solution while requiring minimal maintenance.

Understanding these material durability considerations is vital in selecting cabinetry that not only aligns with your aesthetic preferences but also withstands the daily demands of a functional cooking space.

Eco-Friendly Material Options

Eco-friendly material options are becoming increasingly important in the domain of custom kitchen cabinetry, as homeowners seek sustainable solutions that align with their environmental values. When selecting materials, it is vital to take into account sustainable sourcing to guarantee that your cabinetry is not only stylish but also environmentally responsible. Options such as FSC-certified wood guarantee that the timber is derived from responsibly managed forests, while reclaimed wood and recycled materials effectively reduce demand for new resources, illustrating a commitment to sustainability.

Additionally, innovative alternatives such as bamboo, known for its rapid growth rate and durability, offer a renewable resource for cabinetry. Plywood made without formaldehyde contributes to a healthier indoor environment by minimizing volatile organic compound (VOC) emissions. Further enhancing eco-friendliness, low-VOC and zero-VOC finishes are important in promoting improved air quality while providing protection and aesthetics.

Frequently Asked Questions

How Long Does It Typically Take to Design and Install Custom Cabinets?

The design timeline for custom cabinets typically spans 1-3 weeks, followed by a manufacturing period of 6-12 weeks. The installation process generally requires 2-7 days, depending on complexity and kitchen size.

What Is the Average Cost of Custom Kitchen Cabinetry?

The average cost of custom cabinetry pricing ranges from $500 to $1,200 per linear foot, influenced by factors affecting cost such as materials, design complexity, labor, size, and customization options.

Can I Reface My Existing Cabinets Instead of Going Custom?

Yes, you can reface your existing cabinets instead of opting for custom solutions. Refacing options can rejuvenate your space with new cabinet materials while retaining the original structure, proving a cost-effective and efficient alternative.

How Do I Properly Care for and Maintain Custom Cabinets?

Proper care and maintenance of custom cabinets involves regular cabinet cleaning with gentle solutions and damp cloths. Adhere to maintenance tips such as avoiding harsh chemicals and promptly addressing spills to maximize longevity and appearance.

Are There Any Warranties on Custom Kitchen Cabinetry?

Yes, warranties for custom kitchen cabinetry typically include coverage for defects in cabinet materials and workmanship, often ranging from one year to a lifetime. However, they exclude damage due to misuse or improper maintenance.

Conclusion

Custom kitchen cabinetry offers numerous advantages that enhance both the functionality and aesthetic appeal of cooking spaces. By providing design flexibility, improved ergonomics, and environmentally conscious choices, custom cabinetry supports efficient cooking environments that cater to individual preferences. Additionally, the investment in quality materials can greatly increase property value while enabling personalized design solutions. Ultimately, custom cabinetry stands as a key element in creating a unique and practical kitchen tailored to the specific needs of its users. For more information on how to transform your kitchen with custom cabinetry, call Keechi Creek Builders or visit their website.

Farmhouse Kitchen Remodel Ideas to Bring Rustic Charm to Your Home

To infuse rustic charm into your kitchen remodel, consider incorporating reclaimed wood in cabinets and open shelving, which not only adds warmth but also promotes sustainability. Opt for essential fixtures like a farmhouse sink and Shaker cabinets, which maintain traditional aesthetics while offering functionality. Enhance the ambiance with vintage lighting, such as chandeliers and pendant fixtures. Integrating modern appliances discreetly guarantees that your kitchen remains functional without detracting from its rustic appeal. Additionally, thoughtful storage solutions and cozy textiles can create a welcoming atmosphere. Exploring these elements can meaningfully elevate the rustic charm of your kitchen's design.

Key Takeaways

Natural Material Selection

In a farmhouse kitchen remodel, natural materials play a pivotal role in creating an inviting and rustic atmosphere. The use of reclaimed wood stands at the forefront of this design philosophy, manifesting in various elements such as cabinetry, flooring, and countertops. This material not only imparts unique character but also reduces the demand for newly harvested resources, enhancing the sustainability of your kitchen space. Exposed beams, crafted from reclaimed wood, accentuate the ceiling while lending an authentic rural charm. Additionally, open shelving fashioned from weathered wood planks complements the rustic aesthetic and promotes efficient organization. A reclaimed wood accent wall can further enhance warmth and texture, making the kitchen feel homelike and welcoming. Incorporating natural wood accents extends beyond wood; options like bamboo, recycled glass, and recycled paper composites offer eco-friendly choices that align with responsible design. These materials not only contribute to a stylish appearance but also support environmentally conscious practices. Furthermore, the use of luxurious finishes enables homeowners to blend rustic charm with sophisticated elegance. Through careful selection of natural and reclaimed materials, homeowners can cultivate a kitchen space that is both functional and steeped in rustic elegance, reflecting a commitment to sustainability while ensuring timeless appeal.

Essential Kitchen Fixtures

As homeowners explore kitchen remodels, selecting essential fixtures is vital for achieving a cohesive farmhouse aesthetic. Incorporating a farmhouse sink, renowned for its deep basin and apron-front design, not only enhances functionality but also adds a timeless charm to the space. Additionally, choosing shaker cabinets, characterized by their simple and clean lines, can provide ample storage while aligning seamlessly with the rustic yet refined elements that define farmhouse style. To further elevate the kitchen's ambiance, consider installing farmhouse pendant lights that coordinate beautifully with your appliances and overall design. A wood range hood serves as a striking centerpiece that enhances the overall farmhouse style while ensuring effective ventilation.

Farmhouse Sink Options

Farmhouse sinks are a pivotal fixture in kitchen design, offering a blend of functionality and style that complements various aesthetics. These sinks come in diverse materials, each providing unique benefits suited to different tastes and lifestyles. Stainless steel, lauded for its durability and ease of cleaning, lends a contemporary flair to traditional designs. Fireclay, known for its exceptional durability and chip resistance, showcases a ceramic elegance, while cast iron impresses with its glossy, chip-resistant enamel surface. Copper sinks, with their distinct hammered finishes, develop a natural patina over time, adding character, and porcelain, though less durable, offers a refined, classic appearance. Farmhouse sinks are typically deeper than modern sinks, allowing for more comfortable use and easier handling of large cookware and multiple dishes. Implementing eco-friendly materials in the selection of farmhouse sinks, such as reclaimed wood accents or sustainable metal options, can further enhance the rustic charm of your kitchen design.

When it comes to farmhouse sink designs, options abound to accommodate a variety of kitchen tasks and styles. The single-bowl design provides ample space for larger items, ideal for soaking and washing, whereas the double-bowl design introduces versatility, allowing multitasking with a convenient divider. Features like apron-front designs enhance aesthetic appeal, while undermount and top-mount configurations cater to different installation needs, ensuring that these essential kitchen fixtures seamlessly integrate into your rustic kitchen remodel.

Choosing Shaker Cabinets

Shaker cabinets stand out as a quintessential choice for achieving both functionality and style in kitchen design. Renowned for their timeless appeal, these cabinets perfectly complement the rustic charm of farmhouse aesthetics while offering versatility through various Shaker cabinet styles and finishes. Their clean lines and recessed panels create a visually pleasing design, making them a preferred choice for modern and traditional spaces alike.

When choosing Shaker cabinets for your farmhouse kitchen, consider the following elements to enhance your design:

With a range of finishes available, from matte to glossy, you can tailor the cabinets to fit your vision. Combining simple hardware with contrasting colors further modernizes the Shaker look, ensuring that these cabinets not only meet practical needs but also serve as a stunning focal point in your kitchen. Ultimately, Shaker cabinets embody a balance of function and aesthetic, making them an ideal choice for a farmhouse remodel.

Decorative Elements for Charm

Incorporating nature-infused decor alongside artistic lighting choices can greatly enhance the charm of a farmhouse kitchen. Elements such as potted plants or herb gardens introduce a revitalizing touch of greenery and warmth, creating a vibrant space that connects the interior with the outdoors. Meanwhile, unique lighting fixtures such as vintage chandeliers or handcrafted pendant lights not only illuminate the area effectively but also serve as conversation starters, enriching the overall aesthetic and functionality of the kitchen environment.

Nature-Infused Decor

A nature-infused decor approach is essential for creating a warm and inviting kitchen that embodies the charm of rustic living. By integrating organic elements and textures, your kitchen can evoke a sense of tranquility and connection to the outdoors. Using nature-inspired textiles and organic color palettes can further enhance this ambiance, allowing for a seamless blend of comfort and style.

To create a enchanting nature-infused decor, consider incorporating the following elements:

Artistic Lighting Choices

Illuminating a farmhouse kitchen effectively can transform the entire space, making artistic lighting choices essential for enhancing both functionality and design. Employing vintage chandeliers as statement pieces not only captures the rustic essence of farmhouse aesthetics but also provides ample ambient lighting, creating a warm and inviting atmosphere. These chandeliers can feature weathered wood tones and wrought iron accents, harmonizing with other decor elements.

Alternatively, artistic pendant lights serve a dual purpose; they can provide focused illumination over kitchen islands or dining areas while also contributing to the overall design narrative. Selecting these fixtures with attention to materials—such as those combining distressed wood with industrial metal—confers a unique character to the space. In addition, utilizing wall sconces as supplementary lighting enhances the cozy ambiance, benefiting the kitchen's visual balance.

To achieve a cohesive look, it is imperative to layer lighting types—ambient, task, and accent—while opting for high-quality finishes that complement the versatile nature of farmhouse decor. By thoughtfully integrating these artistic lighting choices, homeowners can elevate their kitchen's charm, ensuring both beauty and practicality are well served.

Cottage-Inspired Features

Cottage-inspired features are crucial for creating a warm and inviting atmosphere in a farmhouse kitchen. By integrating traditional elements and vintage accents, you can achieve a nostalgic yet functional space that feels like home. Choose cottage furniture that emphasizes rustic charm; opt for wooden tables and benches, as these pieces not only serve practical purposes but also contribute to a cozy aesthetic. Additionally, consider incorporating antique items to infuse history into your kitchen design.

To further enhance the cottage-inspired ambiance, consider the following elements:

These features collectively help to create a harmonious blend of comfort and style, making your farmhouse kitchen a delightful space for both culinary creativity and family gatherings. Embracing these elements guarantees that your redesign evokes the timeless charm of cottage living while maintaining a sense of modern sensibility.

Smart Storage Solutions

Maximizing space in a farmhouse kitchen is essential for both efficiency and aesthetics, and smart storage solutions are key to achieving this balance. One effective way to optimize kitchen efficiency is through the use of vertical storage. Open shelving not only provides a practical solution for storing dishes and rustic accessories but also enhances storage aesthetics by creating a visually interesting display. Wall-mounted shelving, including floating shelves, can accommodate cookbooks and decorative items, while baskets and containers can add texture and organization on shelves.

Additionally, cabinet organization plays a vital role in functionality. Incorporating shaker-style cabinets with clean lines retains the farmhouse charm, while fabric cabinet curtains can introduce vintage elements. Organizing kitchen items with dividers maximizes space within cabinets, ensuring that everyday utensils and dishes are easily accessible.

Furthermore, pantry organization can elevate the overall kitchen experience. Utilizing clear glass jars for bulk food storage adds a rustic touch while promoting visibility. Finally, incorporating open shelving under island countertops or using a peg rail for hanging utensils further enhances both kitchen efficiency and storage aesthetics. By implementing these smart solutions, your farmhouse kitchen can remain organized, functional, and visually appealing. Furthermore, working with a custom home builder can ensure that your kitchen design meets all your unique functionality and style needs.

Modern Appliance Integration

Incorporating modern appliances into a farmhouse kitchen can enhance both functionality and style, creating a harmonious blend of contemporary convenience and traditional charm. The integration of high-end appliances with rustic elements promotes a sophisticated yet inviting atmosphere, allowing the kitchen to serve as both a practical space for cooking and an aesthetic centerpiece.

When selecting appliances that complement farmhouse aesthetics, consider the following:

For successful modern appliance integration, focus on clean lines, neutral color palettes, and a balance between industrial and rustic elements. Concealing appliances behind cabinetry can enhance the traditional look, while ensuring energy efficiency contributes to sustainability. With careful planning, your farmhouse kitchen can beautifully incorporate modern appliance aesthetics without sacrificing its rustic roots. Additionally, consider how high-quality materials can elevate both the functionality and visual appeal of your kitchen remodel.

Rustic Style Variations

The charm of a farmhouse kitchen lies in its ability to embrace rustic style variations that encapsulate warmth and character. Central to achieving this aesthetic are features such as reclaimed wood and exposed beams, which provide a foundational sense of coziness and nostalgia. Utilizing rustic flooring options, like distressed hardwood or sturdy stone tiles, further enhances the overall rustic feel, allowing the kitchen to effortlessly connect with nature.

Incorporating a neutral color palette with earthy tones not only complements rustic color schemes but also fosters an inviting atmosphere. Additionally, introducing accents such as shiplap walls and brick elements can greatly add texture and depth to the design. Vintage decor items—like antique light fixtures and enamelware—help reinforce the historical essence of a farmhouse kitchen, while open shelving allows for the display of rustic kitchenware, bridging utility and aesthetics.

To elevate the rustic atmosphere, elements like apron-front sinks and patterned tiles can be seamlessly integrated. By blending these rustic elements with touches of modern design, a sophisticated yet welcoming kitchen space can be created, one that celebrates tradition while effectively serving contemporary needs.

Creating a Cozy Atmosphere

Creating a cozy atmosphere in a farmhouse kitchen hinges on the thoughtful integration of natural elements and warm design choices. By embracing inviting colors and cozy textiles, you can transform your kitchen into a welcoming space that embodies the rustic charm typical of farmhouse aesthetics.

To achieve this, consider incorporating the following elements:

These aspects not only enhance the aesthetic appeal but also promote a sense of comfort and togetherness. Cozy textiles, such as linen curtains or cotton tablecloths, will soften the space, while warm, inviting colors can seamlessly tie together the kitchen's design elements. Additionally, collaborating with an ASID Certified Designer can elevate the design process, ensuring your vision is expertly realized. Ultimately, this thoughtful approach to design guarantees that your farmhouse kitchen becomes a cherished heart of your home.

Frequently Asked Questions

How Can I Incorporate Modern Touches in a Farmhouse Kitchen?

To incorporate modern touches in a farmhouse kitchen, integrate modern appliances with sleek finishes, combine vintage decor with contemporary elements, and utilize a neutral color palette that harmonizes rustic charm with modern sophistication.

What Colors Are Best for a Farmhouse Kitchen Remodel?

When selecting colors for a farmhouse kitchen remodel, consider warm color palettes with neutrals, earthy tones, and deep accents. Utilizing matte paint finishes can enhance rustic charm while maintaining a contemporary and inviting aesthetic.

Are There Specific Maintenance Tips for Farmhouse Sinks?

Yes, specific maintenance tips exist for farmhouse sinks. Understanding the best sink materials and employing effective cleaning techniques, such as using mild soaps and avoiding abrasives, are essential for preserving their aesthetic and functionality.

How Can I Add Character to a Small Farmhouse Kitchen?

To add character to a small farmhouse kitchen, incorporate vintage accents such as antique kitchenware and implement open shelving for a display of cherished items, enhancing both functionality and aesthetic appeal while preserving the rustic charm.

What Are Budget-Friendly Options for Rustic Kitchen Decor?

Budget-friendly options for rustic kitchen decor include integrating reclaimed materials, such as wood and stone, alongside vintage accessories like antique kitchenware. These elements foster an inviting atmosphere while maintaining cost-effectiveness through sustainable practices.

Conclusion

A farmhouse kitchen remodel can effectively enhance the rustic charm of any home through the careful selection of natural materials, essential fixtures, and thoughtful decorative elements. Incorporating cottage-inspired features, innovative storage solutions, and modern appliances guarantees functionality while maintaining aesthetic appeal. The overall design should prioritize creating a cozy atmosphere that reflects personal style and comfort. By integrating these elements, homeowners can achieve a harmonious blend of tradition and modernity within their kitchen space. For more information or to explore your options further, call Keechi Creek Builders or visit their website.

Kitchen Cabinet Painting: Costs and Insider Tips

Kitchen cabinet painting is a cost-effective method to rejuvenate your kitchen, with expenses ranging from $1,000 to $11,000, depending on kitchen size and complexity. DIY projects can save 50-70%, although they require significant time and effort. Proper preparation, including cleaning surfaces and applying multiple thin coats, enhances durability. When choosing paint, consider oil-based for durability or latex for ease, along with suitable finishes to match your kitchen's style. Additionally, selecting high-quality materials can improve longevity. For those seeking professional results, understanding these factors will enrich your planning and decision-making process. More insights are available for further consideration.

Key Takeaways

Cost Factors of Cabinet Painting

Understanding the cost factors involved in cabinet painting is essential for homeowners considering this renovation. A thorough cost breakdown reveals that several elements influence the overall expense. Material selection, including the type of paint and its application method, plays a crucial role in determining durability and visual appeal. For instance, intricate cabinet designs or decorative elements may increase painting costs by 10-15%. Additionally, labor costs can vary greatly based on location and the complexity of the job.

The size and layout of the kitchen also affect pricing; larger kitchens with more cabinet surfaces can ultimately raise the overall expense. On average, small kitchens can expect to pay between $1,000 and $4,000, while medium and large kitchens range from $2,100 to as much as $11,000 for complete painting projects. It is also important to consider that DIY painting costs can significantly reduce overall expenses, with material expenses ranging from $200 to $600 for those opting to take the project into their own hands.

Professional services tend to incur higher costs, with labor requirements such as preparation work, including paint stripping, contributing greatly to the total bill. DIY enthusiasts may find material expenses ranging from $200 to $600, but they should also factor in additional costs for tools and protective gear. Consequently, understanding these nuances in material selection and labor dynamics is crucial for homeowners preparing for a cabinet painting project.

Essential Preparation Tips

Successfully managing the costs of cabinet painting sets the stage for a rewarding project, but equally important is the preparation involved before applying paint. Begin by relocating your refrigerator to allow easy access to the cabinet box panels, keeping it plugged in throughout the process. Implement effective cleaning techniques by washing the cabinet exteriors with dish soap and warm water, utilizing degreasers for particularly greasy areas. Remove all handle and knob hardware carefully, storing them securely to prevent loss. It's crucial to clear and empty your entire kitchen, making certain that countertops are free from items for ideal workspace. Proper preparation minimizes disruption during the painting process, allowing for a more efficient workflow. Additionally, budgeting for additional supplies and tools can enhance your project's success.

Before proceeding to paint, apply sanding tips: scuff sand surfaces using 150-180 grit sandpaper to eliminate the cabinet sheen, which enhances primer adhesion. Remember to wipe down cabinets with a damp cloth to remove dust and debris, employing a tack cloth for a meticulous finish post-sanding. Additionally, verify all kick boards and floors are free of pet hair and dirt. Labeling cabinet components during disassembly can greatly simplify reinstallation, paving the way for a seamless shift from preparation to the painting process.

Choosing the Right Paint

When choosing the right paint for kitchen cabinet projects, it is essential to examine the benefits and drawbacks of different types, including oil-based and latex options. Oil-based paints offer exceptional durability and a smooth finish, although they require more time to dry and produce stronger odors, while latex paints are easier to apply, quick-drying, and increasingly comparable in quality. Additionally, selecting the appropriate finish, such as satin or semi-gloss, can greatly impact both the appearance and functionality of the cabinets, highlighting the importance of using high-quality materials throughout the painting process. For example, using Benjamin Moore Advance can provide a hard enamel finish ideal for high-traffic areas, but it does require sanding and priming for best results.

Latex vs. Oil-Based

Choosing the right paint for kitchen cabinets is crucial, as it greatly impacts both the appearance and longevity of the finish. Two primary options are latex and oil-based paints, each with distinct characteristics that influence their suitability for kitchen applications.

Latex paint is known for its significant advantages, including fast drying times and lower levels of odor and harmful fumes, making it a healthier choice for indoor environments. Additionally, it is easier to work with and clean up, allowing for quicker project completion. However, latex paint does have some disadvantages, namely that it may not offer the same level of durability compared to oil-based options, which excel in resisting daily wear and tear. Investing in quality paint can significantly enhance the durability of latex finishes against daily use.

Oil-based paint, while exceptionally durable, comes with notable disadvantages. It requires longer drying times, emits strong odors, and produces harmful VOCs, making it less suitable for home use. Moreover, cleanup necessitates mineral spirits, adding complexity to the process. When choosing between these types, homeowners must weigh the latex advantages against the oil-based disadvantages to guarantee an ideal finish for their kitchen cabinets.

Finish Types Explained

Selecting the appropriate finish for kitchen cabinets is essential for achieving both aesthetic appeal and practical durability. The choice of finish not only influences the overall look of your kitchen but also impacts paint durability and maintenance.

A semi-gloss finish is often recommended, as it strikes a balance between sheen and functionality. This finish provides a noticeable shine that brightens the kitchen while also being durable and easy to clean, making it suitable for most environments. In contrast, high gloss offers a sleek, reflective surface ideal for modern kitchens, but it can accentuate imperfections, necessitating meticulous preparation and application.

For those who prefer a softer appearance, satin or eggshell finishes deliver a smoother look without the high sheen, making them popular choices for cabinets. These finishes offer adequate resistance to wear while being easier to maintain than their flat or matte counterparts. The latter should generally be avoided in kitchens due to their limited durability and difficulty in cleaning. Ultimately, understanding these sheen comparisons will guide homeowners in making informed decisions for their kitchen cabinet transformations, ensuring both beauty and practicality.

Quality Paint Importance

Investing in quality paint is vital for a successful kitchen cabinet transformation, as it directly impacts both aesthetics and long-term durability. High-quality paint, such as Sherwin-Williams Urethane Trim Enamel or Benjamin Moore Advance, provides exceptional paint longevity, effectively resisting chipping and scratches. Acrylic-alkyd hybrid paints offer finishes comparable to traditional oil-based options, combining the smooth application with reduced drying times associated with water-based paints.

The importance of surface preparation cannot be overstated; proper sanding, cleaning, and priming are essential for achieving ideal adhesion. Neglecting these steps can lead to poor performance and premature wear. Additionally, applying multiple thin coats enhances durability, as each layer strengthens the overall finish.

Furthermore, quality water-based paints have improved greatly, offering durability similar to oil-based alternatives without the strong fumes and yellowing effects that can occur over time. Although high-quality paints may have a higher initial cost, they ultimately save money by reducing the need for touch-ups and replacements. By choosing the right paint and following best practices, homeowners can guarantee a stunning and long-lasting result for their kitchen cabinets.

DIY vs. Professional Services

When it comes to kitchen cabinet painting, weighing the pros and cons of DIY versus professional services can make or break the project's success. The DIY approach offers significant cost savings, often ranging from 50-70% compared to hiring experts. However, it demands considerable time and effort for various tasks, including removal, sanding, and painting. Additionally, not all cabinets are suitable for repainting, particularly those with warping or intricate designs, highlighting the limitations of a DIY project.

On the other hand, professional services present numerous benefits, such as a quality guarantee and time efficiency. Skilled painters possess the expertise needed to handle complex designs and conditions, delivering a high-quality, durable finish that is difficult to replicate without experience. Furthermore, professionals typically use higher-end materials, contributing to a superior appearance and longevity.

Ultimately, the choice between DIY and professional services should be informed by project complexity, personal skill level, and desired outcome. Understanding the DIY pros and cons alongside the professional benefits is essential in making an informed decision that aligns with your specific needs and expectations.

Budgeting Your Project

Budgeting for a kitchen cabinet painting project requires careful consideration of various factors to guarantee a successful outcome without overspending. A well-defined budget is essential, and employing effective budgeting strategies can streamline this process. Begin by estimating the costs, which can range notably depending on kitchen size and cabinet design; for instance, small kitchens might incur expenses from $1,000 to $4,000, whereas larger kitchens can exceed $12,000.

Consider the cost per cabinet face, which generally stands at approximately $100 for drawer faces and $175 for cabinet doors. Additionally, the choice of materials plays a vital role in budgeting—high-quality paint can range from $30 to $70 per gallon. As a result, precise cost estimation is imperative to avoid unnecessary expenditures.

When planning your budget, account for potential supplemental costs such as primers, tools, and labor. Engaging professionals will also introduce varying labor costs based on time spent, potentially adding to your total. Ultimately, knowing your kitchen layout complexity and regional labor rates can greatly enhance your budgeting effectiveness, ensuring that your kitchen transformation remains financially viable while achieving your desired aesthetic.

Insider Decorating Tips

Transforming kitchen cabinets through painting can yield remarkable aesthetic results with the right approach and materials. The success of this project lies not only in the choice of paint but also in essential decorative choices that enhance the overall effect. Here are three fundamental tips to reflect upon:

  1. Select Color Combinations Wisely: Opt for colors that complement each other and resonate with your kitchen's atmosphere. Neutral hues can create a timeless look, while bold colors add vibrancy.

  2. Upgrade Cabinet Hardware: Replacing outdated cabinet hardware can dramatically influence the final appearance of your painted cabinets. Choose fixtures that correspond with your color scheme and style, whether modern or traditional.

  3. Experiment with Finish Options: The finish you select can greatly alter the perception of your cabinet color. High-gloss finishes reflect light and offer a contemporary flair, while satin provides a soft and elegant touch. Additionally, ensuring the use of high-quality materials will enhance durability and overall satisfaction with your kitchen remodel.

Understanding Total Costs

Understanding the total costs associated with painting kitchen cabinets is vital for homeowners looking to undertake this beneficial renovation. A cost breakdown reveals that the national average for professional cabinet painting ranges between $422 and $1,415, with many paying around $895. However, expenses can soar to $7,000 for larger kitchens or more intricate designs. Geographical variations greatly impact these figures, as local labor rates and contractor expertise differ across regions.

Material costs also play an important role; high-quality paint, priced between $30 and $70 per gallon, may dramatically influence the overall budget. Additionally, supplies such as primer, brushes, and sandpaper can cost between $200 and $600, depending on kitchen size and cabinet condition. DIY projects can minimize expenses, with materials costing roughly $200 to $600, although the choice between doing it yourself and hiring professionals should consider labor costs, which average around $50 per hour.

Ultimately, the condition of the cabinets, complexity of the design, and choice of paint contribute to the total costs, making it vital for homeowners to assess all factors before proceeding with their painting project.

Frequently Asked Questions

Can I Paint Cabinets Without Removing the Doors?

Yes, you can effectively paint cabinets without removing the doors. Utilizing cabinet painting techniques and door removal alternatives, such as proper surface preparation and applying paint carefully, guarantees a smooth, professional finish while saving time.

How Long Does It Take to Paint Kitchen Cabinets?

Time estimation for painting kitchen cabinets varies; professionals typically require 4-5 days, including drying times. For DIY enthusiasts, a similar timeframe applies, accounting for varnish drying, necessary coats, and ideal curing conditions to guarantee durability.

What Are Common Mistakes to Avoid When Painting Cabinets?

Common mistakes when painting cabinets include poor preparation techniques, like inadequate cleaning and sanding, as well as unwise color choices. Ensuring proper prep and selecting appropriate colors is essential for achieving a durable and aesthetically pleasing finish.

Will Painting My Cabinets Void Their Warranty?

Painting cabinets can potentially void warranty implications, particularly if cabinet maintenance guidelines are not followed. Adhering strictly to the warranty terms, such as payment, documentation, and care instructions, is essential for maintaining coverage.

Can I Use Leftover Paint on Cabinets?

Using leftover paint on cabinets can be beneficial for cost efficiency. Confirm the paint's compatibility and suitability to maintain cabinet durability, prioritizing quality for ideal finish and longevity in your cabinetry project.

Conclusion

In conclusion, kitchen cabinet painting involves various cost factors, important preparation steps, and considerations for selecting the appropriate paint. Weighing the options between DIY efforts and professional services is vital, as is the need for effective budgeting to guarantee project feasibility. Additionally, insider decorating tips can enhance the overall aesthetic appeal. A thorough understanding of total costs and necessary preparations facilitates a successful cabinet painting project, ultimately delivering satisfactory results and a refreshed kitchen environment. For more information, call Keechi Creek Builders or visit their website to explore your options further.

How To Find Kitchen Remodeling Contractors That Fit Your Lifestyle

To find kitchen remodeling contractors that best fit your lifestyle, begin by clearly defining your project needs, including essential features and aesthetic preferences. Next, research potential contractors through recommendations from trusted sources and online reviews, focusing on their specialization in kitchen renovations. Once you identify candidates, verify their credentials and relevant experience in similar projects. Evaluate their communication style and professionalism by examining their responsiveness and request for consistent updates. Finally, review their portfolios to assess past work quality. Understanding these factors will help you identify a contractor whose skills align with your specific requirements, leading to a successful remodeling experience.

Key Takeaways

Define Your Project Needs

Clearly defining your project needs is an important step in the kitchen remodeling process. This initial stage requires a thorough assessment of your current kitchen, identifying both its strengths and weaknesses. By evaluating kitchen functionality, you can pinpoint areas that necessitate improvement. Consider listing must-have features, which might include enhanced storage solutions or specific appliance requirements. It's essential to determine your storage capacity needs to guarantee your new kitchen adequately supports your lifestyle.

Additionally, evaluating workspace efficiency plays a significant role in the overall design. An efficient workflow not only elevates day-to-day kitchen usability but also enhances design aesthetics. Take time to assess your lighting needs, as appropriate illumination is critical for both practicality and ambiance. Moreover, articulate your aesthetic preferences by deciding on a style—be it modern, farmhouse, or another design. Utilizing design websites, magazines, and platforms like Pinterest can assist in crystallizing your vision. Creating a mood board will help visualize your ideal kitchen aesthetics, setting priorities that reflect your personal taste. Engaging with a professional designer can further refine this vision and guarantee your remodel meets both functional and aesthetic goals, leading to a cohesive and satisfying outcome. In addition, it's important to prioritize layout optimization to ensure efficient use of space and improved workflow throughout the kitchen area. Understanding contractor capabilities is essential when defining your project's needs and ensuring your expectations align with the skills of potential contractors. Furthermore, utilizing innovative materials can enhance the durability and style of your kitchen remodel.

Research Potential Contractors

To effectively research potential kitchen remodeling contractors, start by gathering recommendations from trusted sources such as friends, family, and neighbors who have undergone similar renovations, as personal referrals can notably enhance your list of candidates. In addition, it is essential to evaluate the specializations of these contractors, ensuring that they possess relevant experience in kitchen remodeling projects, which can greatly influence the overall success of your renovation. Verifying credentials and experience is crucial in determining a contractor's reliability and expertise, providing an added layer of confidence in your selection process. By combining personal insights with an assessment of each contractor's area of expertise, you can make a more informed decision in the selection process, especially by focusing on those with extensive experience in kitchen-specific renovations.

Gather Recommendations Effectively

Finding the right kitchen remodeling contractor can feel overwhelming, but effectively gathering recommendations is a crucial first step. Start by utilizing personal referrals from your immediate network. Ask friends, family, or neighbors who have recently completed similar projects for their recommendations. Their firsthand experiences can be priceless. Additionally, social networks can serve as excellent platforms for soliciting suggestions, expanding your reach beyond just those in your circle.

Next, explore online platforms dedicated to contractor reviews. Websites like Yelp and Google Reviews provide insights into various contractors' reputations. Professional directories such as Angie's List and Houzz also feature thorough reviews and ratings, enabling you to gauge contractor reliability. Pay attention to testimonials and case studies that highlight past successes. Furthermore, make sure to assess contractors' specialization in kitchen remodeling, as this can significantly impact the final outcome of your project. The quality of work you receive will heavily depend on the contractor's experience and attention to detail.

To guarantee you are making informed decisions, research contractors' backgrounds by visiting their websites. Here, you can examine their portfolios of previous kitchen remodeling projects, which will give you a sense of their style and expertise. It is also prudent to check for contractor licensing and insurance, which can protect you and assure quality work, ultimately leading to a successful kitchen remodel.

Evaluate Contractor Specializations

Evaluating contractor specializations is essential to guarantee that your kitchen remodeling project is executed by the right professional for the job. Understanding the distinctions between general contractors and kitchen remodeling specialists can aid in making an informed decision. General contractors possess broad expertise and may manage multiple types of renovations, but kitchen specialists bring a focused knowledge that aligns closely with current kitchen trends and design innovations.

When examining potential contractors, consider the following:

Verify Credentials and Experience

When seeking kitchen remodeling contractors, it is essential to verify their credentials and experience to guarantee quality workmanship and professionalism. Start by checking that they possess a valid contractor's license specific to your state and any necessary certifications, as these credentials typically indicate a commitment to industry standards and practices. Additionally, evaluating their relevant experience, particularly in kitchen remodeling, will provide insight into their capability to handle your project effectively, so be sure to request documentation and references that confirm their previous work and training.

Check Qualifications and Licenses

Before selecting a kitchen remodeling contractor, it is essential to meticulously check their qualifications and licenses to guarantee they possess the necessary skills and credibility for the project. This process begins with thorough license verification, ensuring that the contractor is licensed by the appropriate state or local authority. In addition, understanding the importance of certifications is vital; reputable contractors often have certifications from professional organizations such as the NAHB or NARI, underscoring their industry knowledge and commitment to excellence.

Consider the following points:

Assess Relevant Experience

The credibility of a kitchen remodeling contractor heavily relies on their relevant experience, which can be verified through a thorough evaluation of past projects and industry qualifications. It is vital to examine a contractor's portfolio, focusing on completed kitchen remodels that closely resemble your desired project. High-quality before-and-after photos and virtual tours should be scrutinized to gauge their workmanship and adherence to current kitchen trends and design aesthetics. Visiting completed projects allows for firsthand inspection of their work, providing valuable insights into their problem-solving skills.

Additionally, validating a contractor's industry affiliations and certifications is important. Membership in reputable organizations, like the National Association of the Remodeling Industry (NARI), signifies commitment to high standards. Furthermore, identifying areas of specialization, such as high-end or budget-friendly remodels, helps determine if they align with your vision.

Lastly, clear project management and communication practices can greatly influence the remodeling experience. Requesting detailed timelines and understanding how they manage unforeseen challenges guarantees that the contractor is equipped to meet modern expectations while maintaining design integrity. By thoroughly evaluating these aspects, you increase the likelihood of a successful kitchen remodel tailored to your lifestyle.

Evaluate Communication and Professionalism

Effective communication and professionalism are critical factors in evaluating kitchen remodeling contractors. When selecting a contractor, understanding their communication style can greatly impact the overall project experience. Professionalism indicators, such as timely responses and attentive listening, reflect a contractor's commitment to client satisfaction.

To assist in this evaluation, consider the following key elements:

Additionally, assess how effectively the contractor establishes communication channels. This includes understanding their preferred methods of contact and guaranteeing that all relevant parties are included. Contractors who exhibit active listening and maintain a professional tone will likely provide a smoother renovation experience. By prioritizing these elements, you not only foster a strong working relationship but also mitigate potential misunderstandings that could delay the project or lead to unexpected costs. Choosing the right contractor who values communication and professionalism sets the stage for a successful kitchen remodel.

Review Portfolios and Past Projects

Evaluating a contractor's portfolio and past projects provides valuable insights into their expertise and suitability for your kitchen remodeling needs. A well-rounded portfolio showcases portfolio diversity, featuring photographs, videos, blueprints, and sketches of completed kitchen remodels. When reviewing, pay attention to how contractors addressed project challenges, such as outdated wiring or plumbing issues. These examples not only highlight their problem-solving skills but also demonstrate adaptability to various remodeling scenarios.

Quality indicators of a contractor's portfolio include attention to detail in workmanship, variety in kitchen styles, and the use of high-quality materials. Look for evidence showing how contractors effectively managed timelines and adhered to budgets, as this reflects their professionalism and reliability. In addition, client testimonials offer significant feedback regarding project outcomes and overall satisfaction.

Additionally, exploring how contractors approached innovative solutions to common kitchen hurdles can indicate their creativity and forward-thinking. An effective review of past projects will encompass these elements, ensuring you choose a contractor who can deliver quality results tailored to your unique vision and lifestyle, ultimately leading to a successful kitchen transformation.

Understand and Review Contracts

Understanding and reviewing contracts is a critical step when hiring kitchen remodeling contractors, as a well-structured contract serves as the foundation for the entire project. A detailed contract delineates the contractual obligations of all parties involved, ensuring clarity on expectations and responsibilities. Valuable components to reflect upon include:

Moreover, it is essential to examine key clauses, such as payment terms and potential penalties for delays. Pay attention to how changes are documented through change orders, as well as warranty details that outline who is liable for repairs. Thoroughly reviewing the contract can mitigate risks and prevent future disputes, facilitating a smoother remodeling process. As a result, engaging in negotiation regarding any unclear terms is advisable. A well-prepared and transparent contract underscores trust between you and your contractor, providing peace of mind as you initiate your kitchen renovation journey.

Frequently Asked Questions

How Do I Know if a Contractor Is Reputable?

To determine a contractor's reputation, review contractor reviews and verify compliance with licensing requirements. Assess their portfolio, inquire about references, and evaluate their communication professionalism to guarantee they meet industry standards and client satisfaction.

What Should I Consider When Deciding Between DIY and Hiring Professionals?

When deciding between DIY costs and professional benefits, consider expertise, time investment, quality assurance, and potential safety risks. Weigh the satisfaction of personal accomplishment against the efficiency and reliability that professionals provide for kitchen remodeling projects.

Can I Change My Project Scope After Hiring a Contractor?

Yes, you can change your project scope after hiring a contractor. Effective contractor communication is essential for discussing project adjustments, including cost implications and schedule changes, ensuring a mutual understanding and agreement on the modifications.

What Should I Expect During the Kitchen Remodeling Process?

During the kitchen remodeling process, anticipate a structured renovation timeline encompassing planning, demolition, installation, and final touches. Each phase, including kitchen design and structural work, requires careful attention to detail for best results.

How Can I Handle Disputes With My Contractor?

To effectively handle disputes with your contractor, prioritize clear communication. Engage in proactive dispute resolution by documenting conversations, setting expectations, and maintaining regular interactions, ensuring both parties remain aligned throughout the project to mitigate future conflicts.

Conclusion

To find kitchen remodeling contractors that align with your lifestyle, it is essential to adopt a systematic approach. This includes the careful assessment of your project needs, thorough research, and due diligence regarding the contractor's credentials and experience. Effective communication and a review of past work can further illuminate a contractor's suitability. Ultimately, understanding contract terms ensures that expectations are clearly defined, leading to a successful remodeling experience that enhances both functionality and aesthetic appeal in your kitchen space. For more information, consider calling Keechi Creek Builders or visiting their website.

How to Safely Remove Granite Countertops Like a Pro

To safely remove granite countertops like a professional, begin by preparing your workspace: clear items from surfaces and cover nearby areas with protective materials. Turn off water and electrical sources to prevent accidents. Use a utility knife to score around caulking and adhesive, then employ pry bars to detach the granite safely without damaging underlying cabinets. Disconnect any fixtures by shutting off valves and removing water lines carefully. Lift the countertops with assistance, ensuring they are carried vertically to prevent cracks. Following these steps carefully will enhance your efficiency and safety, and further insights are available for those seeking deeper knowledge.

Key Takeaways

Preparation Steps for Removal

Before initiating the removal of granite countertops, it is essential to undertake a series of preparation steps to guarantee a safe and efficient process. An organized workspace is vital to facilitating this task. Begin by developing a removal checklist that outlines each significant step, ensuring no detail is overlooked. Clear all items from drawers, cabinets, and the countertop surface, followed by removing fixtures and disconnecting plumbing lines.

Next, protect the surrounding area using drop cloths and plastic sheeting to minimize cleanup post-removal. Turn off water valves and electrical units to prevent any accidents. It is important to check for utilities, such as electrical wiring and plumbing connections, before proceeding further. Proper tools are essential for preventing damage to cabinets and countertops during the removal process. Additionally, accurate measurements of the workspace must be taken to ensure compatibility for new countertop installation.

Gather the essential tools, including a utility knife, pry bar, and suction cup handles, while wearing safety equipment like gloves and safety glasses to safeguard against injuries. Carefully measure your workspace for new countertop installation, ensuring compatibility. Finally, prepare a dumpster for disposing of the old countertop. By adhering to these preparation steps, you facilitate a streamlined and organized removal process, setting the foundation for a successful countertop installation.

Techniques for Adhesive Removal

In the process of removing adhesives from granite countertops, utility knives and pry bars serve as essential tools that facilitate effective disengagement. The precision of a utility knife allows for careful cutting along adhesive edges, while a pry bar can provide the leverage necessary to detach stubborn sections without damaging the surrounding granite. Employing these techniques in tandem can greatly streamline the removal process, ensuring both efficiency and care in preserving the integrity of the countertop. Remember that immediate cleaning of spills is crucial to maintain the long-term health and appearance of your granite surfaces. Additionally, knowing that granite countertops are typically secured with strong adhesives like silicone can aid in anticipating the methods needed to remove them effectively.

Utility Knife Techniques

Effective removal of adhesive from granite countertops requires precision, and utility knife techniques are essential in this process. Begin by using a utility knife to score any caulking or adhesive, which effectively disconnects the granite from its underlying surface. For stubborn layers, it may be necessary to apply increased pressure or employ a sharper blade to deepen the score. Multiple scoring lines can be advantageous, especially when dealing with thicker adhesives, as they help weaken the bond more efficiently. Employing angled cuts can further reduce adhesive strength and facilitate removal. Additionally, it's important to ensure that the surface is ready for new adhesive by thoroughly cleaning any remaining residues left after the initial removal.

Utility knife safety is paramount during this undertaking. Always wear protective gloves and goggles to guard against potential injuries. Establish a stable working environment to reduce the risk of accidents. After making the cuts, carefully remove any debris and verify the surface is clean before proceeding. Inspect the area thoroughly to confirm that all adhesive has been addressed. Utilizing these adhesive cutting techniques not only enhances effectiveness but also simplifies the preparation for any subsequent installation of new countertops, guaranteeing a smooth and successful project.

Pry Bar Applications

Pry bar applications are an essential technique for successfully removing granite countertops, particularly when dealing with stubborn adhesive. To initiate the process, carefully insert the pry bar into the joint between the granite and the cabinet or wall. Once in position, gently strike the pry bar with a hammer to break the adhesive seal, taking care to avoid excessive force that could damage the granite or surrounding surfaces. When removing granite, it is crucial to ensure you have adequate help to support the weight and prevent any mishaps.

Granite countertops can significantly increase property value, making the effort for safe removal worthwhile. When selecting a pry bar, various types are available, including flat bars for even pressure application and crowbars for increased leverage on tougher seals. Confirm proper pry bar safety by wearing appropriate protective gear and monitoring the granite for signs of movement. Start with the edge of the granite and work slowly, leveraging the pry bar to separate it from the adhesive. It is also wise to employ shims or wedges to support the pry bar if needed. Should the adhesive prove particularly resilient, applying heat can soften it, facilitating easier removal. Once the granite is detached, inspect both the stone and adjacent surfaces for any potential damage, confirming a successful and safe removal process.

Sink and Fixture Disconnection

To successfully disconnect the sink and fixtures during the granite countertop removal process, it is imperative first to shut off the water supply at the valves typically located beneath the sink. Following this, employing proper sink detachment techniques, including carefully removing any hold-down brackets and breaking the adhesive seal, will facilitate the safe removal of the sink itself. Each step requires attention to detail and should be executed with caution to avoid damage to both the plumbing and countertop during the shift.

Water Valve Shutdown

Ensuring a complete water valve shutdown is essential before removing granite countertops, as it prevents leaks and water damage during the process. Begin by locating the shut off valves, typically found beneath the sink or near the water meter; both hot and cold valves must be turned off for a thorough shutdown. To close these valves, turn them clockwise.

It is important to differentiate between the types of valves you may encounter. Gate valves, common in older properties, require multiple turns of their round handles, while ball valves, prevalent in newer construction, need only a 90-degree turn of their lever. After turning off the valves, disconnect the water lines using plumbing tools such as pliers or a wrench, turning the nuts counterclockwise.

Once the lines are disconnected, pull them away gently to avoid damage and set them aside securely. Verify that water flow has ceased by turning on a faucet. If you encounter difficulty or a frozen valve, it is wise to consult a local plumbing company. Ensuring proper valve maintenance not only prevents potential mishaps but also safeguards the integrity of your fixtures during the granite removal process.

Sink Detachment Techniques

Detaching a sink from granite countertops requires careful attention to detail and methodical execution to guarantee a smooth removal process. Begin by disconnecting the plumbing lines: turn the nuts counterclockwise to detach water supplies from the sink's underside. Proceed to remove any faucets by pulling them vertically from the rim. It is essential to break the caulk seals that may bind the sink to the granite; employ a knife, putty knife, or flat chisel for this task. For undermount sinks, locate the metal clips securing the sink to the countertop—these can be unscrewed, though corroded clips may require pliers.

When lifting the sink, be mindful of any adhesive types that may involve silicone caulk. After successfully removing the sink, verify that old caulking is cleaned off both the sink and the countertop. Utilize specialized tools, such as a putty knife or pry bar, to prevent damage to the granite surface. Remember to document all connections meticulously, safeguarding any removed components to prevent loss. Throughout this process, maintaining a clear work area reduces the risk of accidents and promotes safety, thereby facilitating an efficient sink disconnection procedure.

Safe Countertop Lifting Methods

Successful countertop removal relies heavily on safe lifting methods to prevent injury and damage. Employing effective lifting techniques, such as carrying slabs vertically rather than flat, greatly decreases the risk of cracking. Always verify that countertops are secured using moving straps, ratchet tie-downs, and carrying clamps to prevent shifting during transport. Before lifting, confirm that you have the necessary safety equipment, including gloves with grip and steel-toed boots, which help safeguard against accidents.

It is advisable to work in sections, distributing weight evenly among multiple individuals to minimize excessive pressure on any single point. Utilizing prying bars and shims allows for a careful lift that respects the countertop's structural integrity. When transporting, an A-frame can be an invaluable aid, maintaining the slabs in a vertical position and preventing damage. Remember to avoid dragging the countertop, as this may lead to breakage and unnecessary wear.

Finally, assess the weight limits of your equipment and plan a clear path that avoids hazards. By taking these precautions, you can effectively execute safe lifting methods and guarantee both your safety and the preservation of the granite countertops.

When to Hire Professionals

When considering the removal of granite countertops, it is essential to evaluate whether professional assistance is necessary. Several factors can influence this decision, including the type and thickness of the granite, as well as the complexity of the installation. Softer granite varieties and those associated with plywood support may necessitate professional intervention to mitigate the risk of cracking. Conducting a cost analysis, one can weigh the pros and cons of hiring experts versus undertaking a DIY approach.

While hiring professionals incurs additional costs, their expertise can ultimately save money by preventing injuries, damage, and potential fines associated with improper handling. Professionals possess specialized equipment, ensuring an efficient and safe removal process and reducing downtime, which can be especially beneficial for those keen to install new countertops. Conversely, attempting the removal without proper knowledge increases risks considerably, leading to injuries, property damage, and even unforeseen expenses from mistakes.

Additional Tips and Considerations

Granite countertop removal requires careful planning and consideration beyond just the essential steps involved. Anticipating potential removal challenges can greatly enhance the success of your project. Prior to beginning the removal process, confirm your workspace is adequately prepared; this includes clearing the area of items and covering nearby appliances and floors with protective sheeting to prevent any accidental damage.

Another important aspect of removing granite surfaces is mindful countertop maintenance throughout the process. While detaching the countertop, take care to preserve the underlying cabinets to avoid further repairs. Also, as you work, label all connections and verify that water and power sources are appropriately shut off, minimizing the risk of leaks or electrical issues.

Additionally, consider having multiple individuals assist during the removal; the weight of granite can easily overwhelm a single person, leading to potential injury or breakage. Utilize heavy-duty tools, such as pry bars and suction cup handles, and work methodically to avoid costly mistakes. Adopting these practices not only streamlines the removal process but also sets the stage for successful installation of new surfaces, reflecting the importance of thorough planning and awareness during such endeavors.

Frequently Asked Questions

Can I Remove Granite Countertops Without Professional Help?

Removing granite countertops without professional help is possible, but requires careful planning and adherence to DIY tips and safety precautions. Inexperienced individuals may increase risks of damage, making professional assistance highly recommended for best results.

What Should I Do With My Old Countertops After Removal?

After removing old countertops, consider repurposing ideas like creating outdoor tables or decorative pieces. Explore disposal options, such as donating to local charities or recycling centers, ensuring compliance with regulations and supporting sustainable practices.

How Long Does It Typically Take to Remove Granite Countertops?

Time estimates for granite countertop removal typically range from several hours to a full day. Effective removal techniques—considering size, complexity, and fixtures—are essential for ensuring a smooth process, minimizing potential damage during disassembly.

What if My Granite Countertop Has an Undetectable Crack?

If your granite countertop exhibits an undetectable crack, conduct a thorough crack inspection. Repair options may include epoxy resin applications or professional restoration services, ensuring the structural integrity and aesthetics of the countertop are maintained.

Will Removing the Countertop Damage My Cabinets?

Removing a granite countertop can potentially damage cabinets if not executed carefully. Implementing adequate cabinet protection and utilizing support structures during the removal process greatly reduces the risk of cabinet damage, ensuring a safer operation.

Conclusion

In conclusion, the process of safely removing granite countertops involves careful preparation, effective adhesive removal techniques, and proper disconnection of sinks and fixtures. Employing appropriate lifting methods minimizes the risk of damage to both the countertops and surrounding structures. While many homeowners may undertake this task independently, the complexity and weight of granite make it imperative to recognize when professional assistance is necessary. Ultimately, following established guidelines guarantees a successful and safer countertop removal experience. For more information and expert assistance, consider calling Keechi Creek Builders or visiting their website.

Perfect Kitchen Remodeling: A Step-by-Step Guide On How To Start

To initiate a perfect kitchen remodeling project, start with careful planning and budgeting. Assess your current space, establish a realistic budget, and allocate 10-20% for unexpected expenses. Once your blueprint is ready, prepare by clearing the area and temporarily relocating essential items. Focus on kitchen layout, ensuring an efficient working triangle among stove, sink, and refrigerator. Hiring professionals is advisable for their expertise in design and compliance with safety protocols. Throughout installation, maintain systematic inspections to address any issues promptly, ensuring quality and functionality. Each of these steps is vital, leading to a kitchen that enhances both utility and aesthetics.

Key Takeaways

Planning and Budgeting

Effective kitchen remodeling begins with thorough planning and budgeting, which are essential for ensuring that the project meets both functional and aesthetic goals. Initially, it is vital to assess the current kitchen space, identifying its strengths and weaknesses, particularly focusing on storage, workspace efficiency, and lighting. This evaluation helps in defining necessary improvements and prioritizing must-have features versus nice-to-haves. A thorough understanding of your cooking style can also inform your decisions during this assessment, allowing you to create a space that accommodates custom design creation specific to your lifestyle.

Once these elements are established, setting a realistic budget becomes imperative. Begin by determining your financial situation, considering savings and ongoing expenses, to outline total achievable spending. Include all costs, such as materials, labor, permits, and a contingency for unforeseen events. In this phase, employing cost-saving strategies can greatly enhance budget efficiency, allowing for the selection of budget-friendly materials that do not compromise quality. Allocating 20% of the budget for unexpected expenses is a wise move to ensure any surprises during the remodel won't derail your plans. A well-planned remodel can increase home value, as kitchen updates are among the top home improvements for ROI.

Preparing for the Remodel

Preparing for a kitchen remodel requires meticulous attention to several essential tasks, beginning with turning off all utilities to guarantee safety during the renovation process. It is also important to clear out the kitchen space, removing items from cabinets and countertops while cleaning thoroughly to prevent any hazards during demolition. Additionally, budgeting for contingencies is imperative, as unforeseen issues may arise, necessitating extra funds to maintain the project's timeline and quality. Proper planning and design is crucial for a successful kitchen remodel, ensuring that the project meets your expectations and needs. Furthermore, collaborating with a licensed contractor can provide valuable insights into custom-designed living spaces, enhancing safety and efficiency during this initial step of the renovation process. Engaging a licensed contractor for the tear out and demolition phase can enhance safety and efficiency during this initial step of the renovation process.

Turn Off Utilities

Before starting a kitchen remodel, it is vital to turn off utilities to guarantee safety and facilitate a smooth renovation process. The first step in utility disconnection involves shutting off gas, water, and electricity in the kitchen area. This includes disconnecting water and drain pipes connected to the dishwasher, sink, and refrigerator, along with detaching the gas supply from the oven and making sure that hardwired appliances are disconnected from their electricity sources.

To enhance safety measures, meticulously remove glass shades from light fixtures, outlet covers, heat registers, and window coverings. It is essential to exercise extreme caution around electrical wiring and ductwork during demolition. Remove nails and insulation with care, and make sure that any cabinets and trim are taken down using a pry bar or drill for safety. Additionally, protect floors to prevent any damage from tools and debris during the remodel. Before beginning your renovation, conduct thorough pre-demolition checks to confirm that all utilities are properly turned off and disconnected. Additionally, inspect the area for hazardous materials, such as asbestos, and assess the condition of the electrical system for necessary upgrades. Taking these steps not only promotes safety but also sets the stage for a successful remodel, especially since an effective kitchen remodel plan is crucial for minimizing risks during renovations.

Clear Out Space

As the kitchen remodel approaches, it is vital to create a clear and organized environment to facilitate the upcoming renovations. Begin with kitchen decluttering, which involves emptying cabinets, countertops, and drawers. This not only helps to identify unnecessary items but also aids in optimizing the available space for the remodel. Disposing of unused utensils, appliances, and cookware can greatly streamline the upcoming process and reduce the volume of items needing storage or protection.

In preparation for the remodel, establish a temporary kitchen space in a convenient area like the dining room or basement. Equip this space with essential appliances, including a microwave, toaster, and small refrigerator, to maintain your cooking routines. Make sure that this area is both functional and safe to keep daily cooking tasks manageable.

Furthermore, protect valuable and breakable items by packing them securely in labeled boxes for easy unpacking later. It is advisable to cover remaining furniture and fixtures. Consider documenting the original layout by taking photographs, which can be a useful reference during the renovation. Overall, prioritizing kitchen decluttering and space optimization is critical for a smooth and efficient remodeling experience.

Budget for Contingencies

An effective remodeling budget must account for contingencies, generally recommended at 10-20% of the total project cost to address unexpected expenses that may arise during the renovation process. Implementing a contingency fund safeguards your finances against any unforeseen costs, ensuring that your kitchen remodeling journey remains as smooth as possible.

Consider the following common unexpected expenses that could impact your budget:

  1. Structural Repairs: Issues like hidden mold or plumbing problems can greatly escalate costs.
  2. Design Changes: Last-minute alterations to layouts may necessitate additional materials and labor.
  3. Permit Fees: Undetected requirements in your area can incur unplanned expenses.

It is essential to research average costs in your locality, thereby establishing a realistic and thorough budget. Also, employing detailed budget templates enhances tracking of expenses and comparisons to initial estimates. Being prepared with a well-defined contingency plan can alleviate stress, allowing for more efficient decisions. Engage professionals to help identify potential challenges early in the process, enabling a strategic allocation of your funds while remaining flexible to adjust plans as necessary. By prioritizing essential elements and planning for contingencies, your kitchen remodel can be both successful and rewarding.

Design and Layout

In designing a kitchen, selecting the right layout is essential for maximizing both functionality and aesthetics. Various layouts, such as galley, L-shaped, U-shaped, island, and open plan, each offer unique advantages based on your space and lifestyle. A galley layout, with its two parallel walls, is ideal for narrow kitchens, promoting efficiency, while an L-shaped layout efficiently utilizes corner spaces, fostering open-plan living.

Understanding kitchen ergonomics is critical when considering layout. Focus on the working triangle—arranging the stove, sink, and refrigerator within a triangular formation, with each side measuring between 3.9 to 8.8 feet—ensures a smooth workflow. Additionally, the height of countertops should range from 33.5 to 40 inches, tailored to the user's elbow level to create a comfortable working environment.

Other layout considerations include appropriate cabinet placement, ensuring they do not obstruct essential work areas, and innovative storage solutions, such as pull-out shelves and deep drawers, which help maintain organization and enhance usability. By thoughtfully selecting your kitchen layout and incorporating ergonomic principles, you will create a space that is both functional and welcoming. Furthermore, eco-friendly architectural solutions can enhance your kitchen's sustainability while maintaining its aesthetic appeal.

Hiring Professionals

When initiating a kitchen remodeling project, hiring professionals can greatly enhance the overall quality and efficiency of the process. Expert kitchen designers bring invaluable knowledge of contemporary trends and meticulous attention to detail, ensuring a custom design that reflects your unique lifestyle. They facilitate the drafting of renovation contracts, which are essential for setting clear expectations and project parameters.

Consider these benefits of hiring professionals:

  1. Expertise in Renovation: Professionals possess extensive industry experience, ensuring innovative and functional kitchen layouts optimized for your needs.
  2. Comprehensive Project Management: They coordinate all aspects of the remodeling process, from timelines to subcontractors, ensuring compliance with building codes and minimizing disruptions.
  3. Quality and Reliability: With a commitment to superior craftsmanship, professionals use high-quality materials and techniques, along with offering warranties that provide peace of mind regarding potential issues. Moreover, their experience in custom home building can lead to unique designs that enhance both beauty and functionality.

Installation and Execution

The installation and execution phase of your kitchen remodel is critical, involving a systematic step-by-step process that begins with precise preparations and culminates in the final setup of appliances and fixtures. This phase not only includes thorough inspections and testing of plumbing and electrical systems to guarantee they operate effectively but also emphasizes the importance of addressing any issues promptly to avoid complications down the line. By adhering to these essential steps, homeowners can guarantee that their newly remodeled kitchen functions as intended, providing both utility and aesthetic appeal.

Step-by-Step Process

Successful kitchen remodeling requires meticulous planning and execution through a clearly defined step-by-step process. This approach not only enhances kitchen aesthetics but also aligns with current remodeling trends, guaranteeing a functional and beautiful space.

  1. Preparation and Demolition: Start by carefully removing old materials and appliances, guaranteeing safety measures are in place. This includes shutting off utilities and wearing appropriate safety gear. Arrange for debris removal to maintain a clean work area.

  2. Rough-In Work: Execute necessary framing adjustments, rerouting plumbing, and updating electrical systems. Each of these elements must be inspected to ensure a solid foundation for the remaining work.

  3. Finishing Work: Once the rough-ins are complete, focus on insulation, cabinetry, countertop installation, and flooring. Each decision here directly impacts the kitchen's overall aesthetics, so consider current trends for materials and designs that resonate with your vision.

Following this structured approach guarantees that the kitchen remodeling process is efficient and aligned with desired outcomes, setting the stage for the final aesthetic touches that will truly bring the vision to life.

Inspect and Test

Inspecting and testing are critical phases of the kitchen remodeling process that guarantee all installations function correctly and meet established standards. To guarantee thorough evaluations, create an inspection checklist that includes essential elements such as cabinets, countertops, flooring, and appliances. This checklist helps identify any discrepancies in installation and finish that may affect the kitchen's functionality or aesthetics.

During the inspection, it is crucial to carry out plumbing tests by turning on faucets to assess water pressure and detect any leaks. Additionally, check electrical outlets, light switches, and built-in lighting fixtures to confirm they operate as intended. Verify that outlets meet safety regulations, such as being at least six feet from the sink and GFCI protected.

Following the technical inspections, conduct a meticulous assessment of design elements, verifying materials, finishes, and colors align with the agreed-upon plan. Document any issues discovered and share the list with your contractor for prompt resolutions, maintaining the project's quality standards. Completing these steps diligently not only assures compliance but also enhances the overall success of the kitchen remodeling project, leading to a durable and satisfying result.

Address Issues Promptly

Addressing issues promptly during the kitchen remodeling process is essential for maintaining momentum and guaranteeing the project stays on track. Effective issue resolution relies heavily on prompt communication among all parties involved. When potential problems arise—whether they stem from structural challenges, outdated plumbing, or material shortages—immediate attention and collaborative discussion can greatly mitigate disruptions.

To guarantee an efficient response to unforeseen issues, consider the following:

  1. Identify Potential Problems Early: Regularly assess progress and anticipate challenges before they escalate.

  2. Prioritize Essential Upgrades: If the budget constraints emerge, focus on critical upgrades that enhance functionality while accommodating aesthetic preferences.

  3. Discuss Alternatives: Engage with your contractor to explore cost-saving alternatives without sacrificing quality or design integrity.

Final Touches

The concluding elements of a kitchen remodel play a vital role in achieving a polished and harmonious final look. One important aspect of this completion is the selection of backsplash designs, which not only add color but also texture to the space. Opting for materials like glass or mosaic tiles can create visual interest, particularly when coordinated with countertops and cabinets. Hardware styles, such as matte black or brushed nickel, should also be chosen with care to enhance functionality while maintaining aesthetic harmony across the kitchen.

Incorporating decorative accents can personalize the area, with options including plants, art, and distinctive small appliances. These accents should complement the overall color scheme and material variety to avoid clutter, fostering a balanced design. Finally, performing final inspections is essential. This involves creating a punch list to address any outstanding items and conducting a thorough walk-through to confirm every element adheres to local building codes and quality standards. Collaborating with professionals during this stage will guarantee that all finishing touches are executed meticulously, concluding the kitchen renovation with precision and aesthetics in mind. Additionally, utilizing high-quality materials, much like those found in luxury bathroom remodeling, can elevate the overall feel of the space and ensure a lasting impression.

Frequently Asked Questions

How Long Does a Typical Kitchen Remodel Take?

The duration of a kitchen remodel varies considerably due to timeline factors, including the size of the project and remodeling phases. Typical small projects may take 4-8 weeks, while large remodels may extend to 6 months or longer.

What Permits Are Needed for Kitchen Remodeling?

For kitchen remodeling, a building permit is essential for structural changes, while electrical, plumbing, and mechanical permits may be required. Be mindful of local building codes and potential permit fees to guarantee compliance.

Can I Live in My Home During the Remodel?

Yes, you can live in your home during the remodel, but be prepared for renovation adjustments. Designate a temporary living area and plan for alternative meal preparation to minimize disruption and maintain comfort throughout the process.

What Should I Do With My Kitchen Appliances?

When considering kitchen appliances, prioritize responsible disposal or recycling of old models while exploring energy-efficient options. Appliance upgrades can enhance functionality and reduce long-term costs, ultimately improving your kitchen's performance and sustainability.

How Can I Minimize Disruption During the Renovation?

To minimize disruption during renovation, establish a temporary kitchen setup to maintain daily cooking routines. Additionally, carefully coordinate your renovation schedule, ensuring it aligns with low-occupancy periods for ideal convenience and efficiency.

Conclusion

In summary, a successful kitchen remodeling project requires meticulous planning, careful budgeting, and informed decision-making at each stage. From initial preparations and design considerations to the selection of professionals and the execution of the installation, each phase greatly impacts the outcome. Final touches, although seemingly minor, can enhance the overall aesthetic and functionality of the space. Adhering to a structured approach guarantees a cohesive, efficient remodeling process that ultimately results in a kitchen that meets both practical and aesthetic needs. For more information or to get started on your project, call Keechi Creek Builders or visit their website today.

Step-by-Step Guide: How to Build the Perfect Kitchen Island

To build the perfect kitchen island, start by evaluating your kitchen layout and determining ideal dimensions, ensuring the island does not exceed 10% of the total kitchen space. Choose durable countertop materials like granite or quartz, balancing aesthetics with functionality. Incorporate effective storage solutions, such as drawers and open shelving, to enhance usability. Construct a strong frame using 2x4s and maintain at least 36 inches of clearance for movement. Adherence to local building codes is essential during installation. Each step builds upon the previous, ensuring a harmonious integration into your kitchen. Further insights on this process can enhance your project.

Key Takeaways

Design Considerations

When designing a kitchen island, several key considerations play an essential role in guaranteeing both functionality and aesthetic appeal. One important aspect is the island dimensions, which should be carefully chosen to maintain space efficiency while providing adequate workspace. Ideally, a kitchen island measures 36 inches by 48 inches, offering 12 square feet of countertop area, suitable for multitasking and meal preparation. However, it is necessary to verify the island does not exceed 10 percent of the kitchen's total square footage, as larger islands may overwhelm the space.

Clearance is another significant factor; a minimum of 42 inches of space around the island is recommended to facilitate movement and access to appliances. Additionally, the layout should support the kitchen work triangle, enabling seamless navigation between the sink, stove, and refrigerator within a combined total of 25–30 feet. Moreover, it is advisable that no leg of the triangle intersects the island to minimize unnecessary steps. Incorporating seating requires additional thought, with 24 inches of countertop length designated per person and an adequate clearance behind chairs to guarantee unobstructed access. Maintaining a minimum of three feet between the perimeter counter and the island is essential for optimal flow, especially in busy kitchens. Organized waste storage solutions can also be integrated into the design of the kitchen island to enhance both functionality and aesthetics. A well-planned kitchen island enhances both utility and overall kitchen design.

Countertop Material Options

When selecting a countertop for your kitchen island, it is essential to take into account both durability and aesthetic style, as these factors greatly impact functionality and visual appeal. Materials such as granite and quartz offer impressive durability, resisting heat and stains, while marble adds an element of sophistication but requires careful maintenance due to its susceptibility to damage. Additionally, the durability of engineered quartz is recognized as a key advantage, making it an excellent choice for those prioritizing long-term functionality in their kitchen island design. Meanwhile, butcher block countertops provide a warm, rustic charm; however, they may not withstand heavy wear and tear as effectively as stone alternatives, necessitating a thoughtful balance between style preference and practical use. Premier Remodeling and Custom Projects emphasizes the importance of custom design options to ensure that your island's countertop aligns perfectly with your overall kitchen aesthetic. When considering butcher block countertops, it is important to apply several layers of mineral oil coating to protect the wood and enhance its longevity.

Material Durability Considerations

Choosing the right countertop material for a kitchen island entails careful consideration of durability, as this directly impacts both functionality and longevity. When evaluating options, granite and quartz emerge as popular choices due to their respective advantages. Granite, renowned for its heat resistance, can withstand high temperatures, making it an ideal surface for cooking. Its scratch resistance also serves well in busy kitchen environments, although sealant is necessary to maintain its stain resistance, given its porous nature. With proper care, granite can last for decades, making it a durable investment in terms of longevity. Additionally, both quartz and granite excel in heat and scratch resistance, ensuring they can handle daily kitchen activities effectively.

On the other hand, quartz offers significant benefits due to its non-porous composition, which provides excellent stain resistance as well as bacteria protection, necessitating minimal maintenance. Although quartz is heat-resistant, extreme temperatures (typically above 175-185°F) should be avoided to prevent damage. Both materials possess a good degree of scratch resistance, although care is required to avoid chipping at edges. Consequently, choosing between granite and quartz depends on individual needs and maintenance preferences, ensuring that the selected countertop fulfills both aesthetic and practical requirements over time.

Aesthetic Style Choices

The aesthetic appeal of a kitchen island can be considerably enhanced by selecting the right countertop material, influencing both the kitchen's overall ambiance and style. Various options exist, each offering unique color combinations and patterns. Natural stone, such as granite and marble, provides timeless elegance and sophistication, making them ideal for classic and traditional designs. Granite's impressive array of color varieties, including steel gray and black pearl, complements many style trends, while marble's distinctive veining adds a luxurious touch. Additionally, granite countertops are highly durable, making them a practical choice for everyday use.

For those leaning towards modern aesthetics, engineered materials like quartz, laminate, and concrete present compelling choices. Quartz allows for vivid colors and contemporary patterns, making it versatile enough for various designs. Laminate's ability to mimic high-end materials provides an economical option without sacrificing style. Stainless steel countertops cater to industrial themes, lending a sleek, professional look to any kitchen space.

Ultimately, the key to achieving the perfect kitchen island lies in harmonizing countertop materials with existing décor and style trends. By carefully considering the visual impact of each material, homeowners can establish an inviting focal point that enhances the overall kitchen experience.

Building the Island

Carefully laying out a plan is fundamental for building a kitchen island that enhances both functionality and aesthetics. Begin by determining the island dimensions to guarantee a comfortable working space; it is recommended to maintain a clearance of at least 36 inches around the island, ideally increasing this to 42 or 48 inches for maximum usability. To visualize your design effectively, use painter's tape on the floor to mark the island's footprint, allowing for layout refinement while guaranteeing there is sufficient space for movement.

Consider the existing cabinets, selecting materials and colors that either match or complement your kitchen's current decor. Planning the layout is crucial, as it involves accounting for door clearance and guaranteeing the island fits seamlessly within the designated space. After you finalize the dimensions, you can choose stock base cabinets that fit your design, providing important storage capabilities.

Once the base is prepared, cut the flooring if necessary, and create a strong frame to support the island, using 2x4s or similar materials. Secure all elements meticulously to guarantee stability throughout the construction process, paving the way for a well-designed kitchen island that integrates beautifully into your home.

Enhancing Functionality and Storage

Enhancing functionality and storage within a kitchen island is essential for maximizing its usability and efficiency. To achieve this, incorporating meticulously designed drawer organization is key. Various drawer types, including hidden compartments, can maintain a clean aesthetic while providing accessible storage for bulky appliances. Built-in cabinets paired with deep shelving optimize vertical space, allowing for the storage of larger cooking equipment and emphasizing architectural interest.

Furthermore, open shelving solutions serve a dual purpose of displaying decorative items and storing essential appliances. Deep, open shelves can accommodate blenders or slow cookers, while floating shelves introduce additional display space to complement various kitchen styles.

Equally important are corner solutions that utilize otherwise wasted space. Incorporating features such as lazy Susans and pull-out drawers maximizes functionality in corner areas, ensuring that every inch of storage is accessible. Hidden compartments can efficiently store bulky items while keeping the island tidy. Customizable storage options allow homeowners to tailor their kitchen islands according to specific needs, blending aesthetic appeal with practical storage solutions. In this way, a thoughtfully designed kitchen island can greatly enhance the overall functionality of the kitchen space. Additionally, the emphasis on creating one-of-a-kind spaces allows homeowners to design kitchen islands that reflect their unique style and enhance their living experience.

Material Selection Process

When selecting materials for a kitchen island, homeowners must prioritize durability, maintenance, and aesthetic preferences. The choice of material greatly impacts the island's overall performance, functionality, and style. Homeowners need to weigh options carefully, especially considering budget constraints that may limit their selections.

Key considerations should include:

Installation and Safety Measures

Proper installation of a kitchen island is vital for both functionality and safety within the home. Begin with meticulous pre-installation planning that includes maintaining a minimum of 36 inches of clearance on all sides to facilitate traffic flow and prevent obstruction of appliances. Choose an island size that integrates efficiently with your kitchen layout while avoiding interference with existing plumbing and electrical connections. It's important to adhere to local building codes, particularly concerning installation techniques for electrical and plumbing systems.

When assembling the island, secure cabinets to the floor using 2x4s and screws, guaranteeing stability. Employ appropriate installation techniques such as floor anchoring with anchors or shims and using clamps and adhesive for countertop attachment. Regularly test the island's stability and weight capacity, confirming that it meets necessary safety protocols. Additionally, consider incorporating energy-efficient features to improve overall home value and sustainability.

Additionally, make certain that emergency shutoff points for electrical and plumbing components are easily accessible. Implement floor protection measures during installation to avoid damage. Finally, routinely inspect and maintain your kitchen island's connections to mitigate potential safety hazards, assuring a safe and functional addition to your cooking space for years to come.

Frequently Asked Questions

What Is the Average Cost of Building a Kitchen Island?

The average cost of building a kitchen island ranges from $100 to over $10,000, influenced by cost factors such as materials, customization, and size. Effective budgeting tips include prioritizing essential features and evaluating installation expenses.

How Long Does It Typically Take to Build a Kitchen Island?

The construction timeline for building a kitchen island typically ranges from 10 to 40 hours, influenced by design complexity and size. The assembly process can further extend based on material selection and additional installations.

Can I Build an Island Without Professional Help?

Yes, you can build a kitchen island without professional help. With intermediate skills, proper planning, and essential tools, it's feasible for DIY projects. Consider beginner tips to navigate challenges and guarantee a successful outcome.

What Tools Are Necessary for Building a Kitchen Island?

Essential tools for building a kitchen island include power tools like circular and miter saws, drills, and nail guns, along with measuring tools such as measuring tapes and levels to guarantee accuracy and alignment throughout the project.

How Do I Choose the Right Style for My Kitchen Island?

To choose the right style for your kitchen island, consider integrating modern designs with traditional aesthetics, balancing functionality and visual appeal, while ensuring harmony with your existing kitchen decor and overall layout.

Conclusion

Building the perfect kitchen island involves meticulous planning and selection of materials, ensuring both aesthetic appeal and functional efficiency. By considering design elements, choosing suitable countertop materials, and enhancing storage capabilities, one can achieve a well-integrated island that elevates kitchen utility. In addition, adherence to proper installation techniques and safety measures is essential to guarantee durability and user safety. When these factors are cohesively addressed, the resulting kitchen island serves as a pivotal component of culinary and social interactions. For more information, feel free to call Keechi Creek Builders or visit their website.

The Pros and Cons of Laminate Kitchen Countertops

Laminate kitchen countertops present a range of advantages, including affordability, with costs typically between $20 and $30 per square foot, and extensive design options that realistically mimic materials like granite. They are lightweight and easy to install, which can also lower labor expenses. However, disadvantages include their vulnerability to heat and scratches and a lifespan of approximately 10 to 15 years, outperformed by natural stone alternatives. Proper maintenance, such as gentle cleaning and the use of cutting boards, can enhance durability. Understanding these factors will help homeowners make informed design choices and consider alternatives as they weigh their options.

Key Takeaways

Advantages of Laminate Countertops

While homeowners often seek materials that combine aesthetics and functionality, laminate countertops stand out due to their numerous advantages. One key benefit is affordability; with prices starting at $20-30 per square foot installed, laminate notably undercuts alternatives such as granite and marble. In addition, the lightweight nature of laminate sheets contributes to cost-effective installation techniques, making it a feasible choice for DIY projects, thereby saving on labor costs.

In terms of durability factors, laminate countertops exhibit remarkable stain resistance and easy maintenance, requiring only mild soap and water for cleaning. Although their lifespan ranges from 10 to 15 years, high-quality, professionally installed countertops may last 20+ years with proper care, which can extend usability even further. Additionally, laminate's resilient surface withstands scratches from everyday household items and effectively prevents moisture penetration, lending itself to high-traffic areas like kitchens. This is further enhanced by an advanced layer design that offers enhanced durability against everyday wear and tear.

The versatility of design options available in laminate allows homeowners to select from an array of colors, patterns, and textures, many of which successfully mimic more costly materials. Consequently, laminate countertops present an economic and aesthetic solution, striking a balance between style and practicality for any kitchen environment.

Disadvantages of Laminate Countertops

Despite their many advantages, laminate countertops come with several significant disadvantages that can affect their overall appeal and functionality in a kitchen environment. One primary concern relates to durability; laminate surfaces are not heat-resistant, making them vulnerable to burns from hot pans, and they can easily scratch or chip when exposed to sharp objects or heavy impacts. These durability concerns extend to the potential for delamination, whereby moisture can infiltrate seams and cracks, leading to costly repairs. Additionally, laminate countertops are ideal for busy households due to their low maintenance needs, which can be overlooked when considering their vulnerability.

Though advancements in laminate technology have improved the durability of surfaces, the core issue remains that they still have limited heat resistance, making them susceptible to damage from high temperatures. Maintenance challenges also arise, as laminate countertops require diligent care to prevent irreversible damage. Stains can permeate the surface if spills are not addressed promptly, and excessive water exposure may cause swelling and other forms of deterioration. Repairing scratches is significantly difficult, often necessitating professional intervention. Given these factors, homeowners must exercise caution and employ protective measures, such as using trivets and cutting boards, to maintain the surface integrity.

Ultimately, while laminate countertops offer a range of design options, the trade-offs related to durability and maintenance can impact their longevity and functionality, making them less suitable for higher-traffic environments.

Cost Comparison With Other Materials

When evaluating kitchen countertop options, cost is a critical factor that often influences material choice. Laminate countertops emerge as a budget-friendly solution, with installed prices averaging between $600 and $3,200, translating to approximately $20 to $80 per square foot. In comparison, granite and solid surface materials typically range from $35 to $200 and $1,500 to $6,000, respectively, highlighting laminate's more accessible pricing strategies. Moreover, while laminate can initially appear attractive due to these lower costs, it is essential to take into account long-term value. Laminate surfaces generally have a lifespan of 10 to 15 years, whereas granite can last a lifetime, potentially making the latter more cost-effective over time. Additionally, labor costs for laminate installation range from $10 to $30 per square foot, which can affect overall budget considerations. In addition, custom laminate installations may increase expenses by up to 25%, particularly for larger kitchens or higher-end laminate types, which can vary from $10 to $50 per square foot. By weighing upfront costs against longevity and durability, homeowners can make informed decisions reflective of both immediate budgets and future financial implications. This thorough view of laminate in relation to other countertops emphasizes the importance of evaluating both initial costs and ongoing value in the kitchen design process. Notably, granite surfaces are renowned for their extreme durability and can provide a very high long-term value for those who can accommodate the upfront investment. To ensure that your kitchen reflects your unique style and needs, working with custom design professionals is highly recommended.

Maintenance and Care Tips

Proper maintenance and care are vital to maximizing the lifespan and appearance of laminate kitchen countertops. To maintain these surfaces, utilize gentle cleaning methods, such as mild, non-abrasive cleaners specifically formulated for laminate. A soft cloth dampened with a mixture of soapy water can effectively remove daily dirt and grime; however, it is important to rinse the cloth frequently to prevent the spread of residue. After cleaning, remember to dry the countertops thoroughly with a clean cloth, as this helps avert water spots and streaks, and be cautious of excess water, particularly around seams, to avoid delamination. Additionally, always avoid abrasive cleaners to protect the laminate finish from scratches.

In terms of stain removal, a straightforward DIY solution using a paste made of baking soda and water can be applied to stubborn stains and wiped clean with a damp microfiber cloth. Preventive measures can further extend the life of your countertops; for example, using cutting boards safeguards against scratches, while trivets or placemats offer heat protection. It is advisable to avoid contact with harsh chemicals or exposing surfaces to excessive heat. Regular cleaning habits, alongside preventive strategies, contribute considerably to long-term durability and visual appeal.

Design Options and Aesthetics

The design options and aesthetics of laminate kitchen countertops are strikingly diverse, making them a popular choice for homeowners seeking both functionality and style. With hundreds of designs available, laminate surfaces can easily mimic luxury materials like granite, quartz, and marble, while offering significant cost savings. Manufacturers, such as FLOFORM and WilsonArt, provide over 150 stock colors and textures, enabling versatile color trends and unique texture combinations that cater to various tastes.

Consider the following aesthetic elements:

Moreover, laminate countertops can adapt to various design styles—from modern Victorian to urban-industrial chic—demonstrating their aesthetic versatility. Whether opting for a square edge or a waterfall effect, the options provide ample opportunities to create a beautiful and functional kitchen space without compromising on visual elegance. Additionally, laminate countertops can be integrated with structural and interior design to enhance the overall functionality and appeal of the kitchen.

Frequently Asked Questions

Are Laminate Countertops Eco-Friendly or Sustainable?

Laminate countertops can represent eco-friendly materials when produced with sustainable practices, such as using low-VOC formulations and responsibly sourced components. However, careful consumer choices are essential to optimize their sustainability throughout the product lifecycle.

How Do Laminate Countertops Compare to Solid Surface Options?

When comparing laminate countertops to solid surface options, cost considerations greatly favor laminate, while maintenance differences highlight solid surfaces' durability and easier stain resistance, making them preferable for high-traffic environments despite their higher initial investment.

Can I Use Laminate Countertops in Commercial Kitchens?

Yes, laminate countertops can be used in commercial kitchens, but durability concerns and maintenance requirements must be considered. Regular upkeep is essential to prevent wear and guarantee longevity in high-demand environments.

What Types of Finishes Are Available for Laminate Countertops?

Laminate countertops offer various finishes, including textured finishes such as suede and beaded textures for durability, alongside glossy finishes like shimmering radiance. Each type provides unique aesthetic qualities and practicality suitable for diverse applications.

Are There Warranty Options for Laminate Kitchen Countertops?

Warranty options for laminate kitchen countertops typically feature a one-year warranty duration, covering defects in materials and workmanship. Proper installation and maintenance are essential for warranty coverage, with exclusions for damage from misuse or abuse.

Conclusion

To conclude, laminate kitchen countertops present a range of benefits, including affordability and a diverse array of design options, making them an attractive choice for many homeowners. However, potential drawbacks, such as susceptibility to damage and limited longevity compared to alternative materials, must be considered. Ultimately, an informed decision regarding countertop selection should weigh these pros and cons against individual preferences, budget constraints, and desired aesthetic outcomes, ensuring a satisfactory and functional kitchen environment. For more information, call Keechi Creek Builders or visit their website to explore your options.

The DIY Guide to Removing Kitchen Cabinets

Removing kitchen cabinets involves a methodical approach that prioritizes safety and efficiency. First, disconnect all utilities and remove cabinet contents to mitigate injury risks. Gather essential tools, including a drill, screwdriver, and pry bar, making certain they are in good condition. Start by removing upper cabinets, scoring paint edges to prevent wall damage, and using a stud finder to identify fasteners. For lower cabinets, detach countertops before unscrewing from wall studs. Throughout the process, maintain organization by labeling components and disposing of debris responsibly. Following these steps will guarantee a smooth cabinet removal; further insights await you if you continue.

Key Takeaways

Preparation for Removal

Before starting the removal of kitchen cabinets, it is essential to thoroughly prepare the area to guarantee a smooth and safe process. The first step involves disconnecting all utilities, including power and water, associated with any integrated appliances and cabinets. Turn off utilities ensures that you avoid any accidents during the cabinet removal process. Clearing the workspace is imperative; removing all contents from the cabinets will lighten the load, minimizing the risk of injury during removal. Additionally, protect your floors with drop cloths to prevent damage.

Next, gather the necessary tools and supplies. Important tools include a drill, screwdriver, pry bar, and utility knife, which are essential for executing effective removal techniques. Wear appropriate safety gear, such as gloves and goggles, to mitigate potential hazards.

Begin by disassembling the cabinet layout strategically—remove doors by unscrewing hinges, and take out drawers by lifting them out. If applicable, detach countertops carefully, ensuring support is in place if they are substantial. Don't forget to disconnect integrated appliances per manufacturer instructions, documenting any specific hardware used to connect the cabinets. Following these preparatory steps will facilitate a more efficient cabinet removal process, paving the way for future renovations.

Removing Upper Cabinets

Removing upper cabinets can be an intimidating task, but with the right preparation and tools, it can be accomplished efficiently. To guarantee a successful removal, follow these essential steps:

  1. Preparation: Empty the cabinets and remove any doors to make handling easier. Ensure that you have the necessary tools on hand to facilitate the removal process without damage.

  2. Safety Gear: Equip yourself with gloves and goggles for protection.

  3. Detaching: Use a stud finder to locate screws securing the cabinets to the wall. Begin removing screws from the bottom, lifting the cabinet away as you progress to the final screws.

  4. Handling Trims: Score the paint around the edges where the cabinets meet the wall to prevent damage, and employ a putty knife to loosen any attached trim. Understanding the assembly type is crucial for devising the most effective removal strategy.

It is also important to recognize that different cabinet styles may necessitate varied removal methods, whether they are glued, screwed, or a combination of both. Additionally, be vigilant for any hidden electrical or plumbing connections that could complicate the removal process. After successfully removing the cabinets, inspect the wall for lingering debris or screws, as this will facilitate wall repairs and prepare the space for new installations or renovations.

Removing Lower Cabinets

To successfully remove lower cabinets, a systematic approach is crucial. Begin by preparing for the removal; disconnect utilities such as power to under-cabinet lighting and water supply to sinks or dishwashers. Empty the cabinets of all contents to reduce weight, and clear the countertops and surrounding areas while protecting the floors with drop cloths. Additionally, having a solid storage plan for your cabinet contents during removal will help keep your workspace organized. It is essential to assess cabinet installation type as it can determine the complexity of the removal process.

Next, detach the countertops, which may involve removing screws from below and using a pry bar to break any adhesive bonds. This process may require assistance for safely lifting the countertop away. Following this, unscrew the cabinets from the wall studs and remove any screws securing them along the back and sides. If needed, use a pry bar to gently separate the cabinet from the wall while having a helper support it to prevent damage.

Finally, lift the cabinet away from the wall, carefully removing any base trim or quarter-round trim around the cabinets. Clean up debris, consider patching any wall holes, and if the cabinets are still in good condition, look into donating them for reuse. This organized method guarantees the safe removal of lower cabinets while maintaining the integrity of your kitchen's lower cabinet design and cabinet storage.

Tools and Supplies Needed

Successfully executing the removal of lower cabinets requires the right tools and supplies to guarantee efficiency and safety throughout the process. Understanding the various cabinet materials and installation techniques will also aid in choosing the appropriate equipment. Below are essential tools and supplies you will need:

  1. Pry Bar/Crowbar: Ideal for loosening cabinets from the wall and removing stubborn fasteners.
  2. Utility Knife: Useful for cutting through caulk and adhesive around the cabinet edges.
  3. Drill/Electric Screwdriver: Essential for removing screws quickly from hinges and fixtures.
  4. Hammer: Assists in prying and tapping loose any components that resist removal.

In addition to the essentials, consider having other tools such as a reciprocating saw for more complex dismantling, a voltage detector pen for electrical safety, and a stud finder to locate wall supports. Having safety equipment, including gloves and goggles, will protect you throughout the project. Finally, a measuring tape and spare lumber can aid in support, ensuring that you execute this task efficiently, safeguarding both the cabinets and your surroundings in the process. Properly removing kitchen cabinets can help ensure your safety during the removal process.

Safety and Cleanup

Safety during the removal of kitchen cabinets is paramount to prevent accidents and guarantee a smooth process. Begin by confirming that the power is off at the breaker box, and wear safety goggles, gloves, and a dust mask to protect against particles and debris. Additionally, applying floor protection will help avoid damage during the removal process. Check for hidden electrical connections and turn off utilities as needed.

Before starting, clear out the cabinets completely, disconnect plumbing and electrical connections, and remove cabinet doors and drawer fronts. Lightening the load by removing shelves can greatly ease the process. Utilize a stud finder to locate wall studs, applying pressure from a pry bar only to these areas, and use a piece of plywood to distribute pressure and protect your walls.

During the cleanup phase, remove debris as you work to maintain a safe environment. It is advisable to keep loose screws and hinges in organized containers to avoid losing them. If the renovation is extensive, consider renting a dumpster for disposal purposes. Finally, confirm all work areas are clear before moving on to subsequent stages of your project, promoting safety and efficiency throughout your renovation.

Additional Considerations

When undertaking the removal of kitchen cabinets, several additional considerations can enhance the efficiency and outcome of the project. Proper preparation can greatly impact the success of your endeavor, especially concerning understanding the specific cabinet design and installation methods used in your kitchen. Here are some key considerations to keep in mind:

  1. Tool Preparation: Make sure you have the correct tools, including a screwdriver, pry bar, utility knife, and a stud finder. Each tool plays an essential role in safely disassembling cabinets without damaging surrounding structures.

  2. Disconnecting Appliances: Before commencing, remember to disconnect power to any relevant fixtures and water supply as necessary, guaranteeing a safe work environment.

  3. Label Components: For ease of future assembly or storage, meticulously label each cabinet component, including doors, drawers, and fasteners.

  4. Protect Surroundings: Use drop cloths or protective coverings to shield your floors and countertops from potential damage throughout the process.

Frequently Asked Questions

Can I Remove Cabinets Without Damaging My Walls?

Yes, you can remove cabinets without damaging walls by employing effective wall protection techniques and utilizing appropriate cabinet removal tools. Employing a pry bar carefully, along with support panels, minimizes the risk of damage during removal.

How Do I Dispose of Old Cabinets Properly?

To dispose of old cabinets properly, consider cabinet donation options through local charities, as well as recycling wood and materials where applicable. Contact waste management services to identify recycling opportunities and guarantee responsible disposal.

What if My Cabinets Are Glued to the Wall?

If your cabinets are glued to the wall, employ effective cabinet removal techniques, utilizing a pry bar and protective materials. Explore adhesive removal methods to facilitate the process while minimizing damage to surrounding structures.

Should I Remove Countertops Before Cabinet Removal?

Yes, countertop removal should typically precede cabinet installation. This approach facilitates easier access to the cabinets, minimizing potential damage and ensuring a smoother installation process, particularly when dealing with attachments or weight-bearing considerations associated with countertops.

Can I Reuse the Cabinet Hardware After Removal?

Yes, you can reuse cabinet hardware if it remains undamaged and compatible with your design. Assess various hardware types and explore reuse options, ensuring proper cleaning and careful installation to maintain functionality and appearance.

Conclusion

To summarize, the process of removing kitchen cabinets requires careful preparation, specific tools, and adherence to safety guidelines. By systematically addressing both upper and lower cabinets, and ensuring proper cleanup afterward, the task can be accomplished efficiently and effectively. Consideration of structural implications and potential reuse or disposal options further enhances the overall approach. Following this thorough guide will facilitate a successful cabinet removal, ultimately allowing for subsequent renovations or enhancements to the kitchen space. For more information or professional assistance, call Keechi Creek Builders or visit their website.

Skip to content